The following steps were completed to setup Simple Cache during the 2018 Speed Study of Simple Cache.

How to Setup Simple Cache – Step by Step

Steps 1 & 2: Let’s start by jumping into our WordPress Dashboard and clicking through to Add New Plugins. In the search bar, type Simple Cache. Then click Install Now.

Install Simple Cache Plugin - Screenshot 1

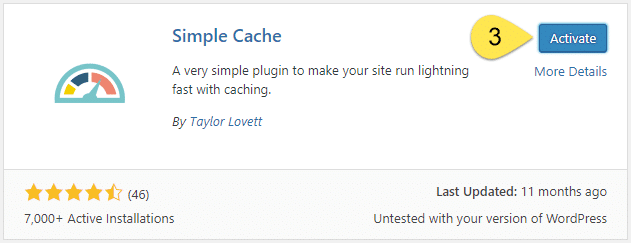
Step 3: Once Simple Cache is installed, click Activate.

Activate Simple Cache - Screenshot 2

Step 4: Find Simple Cache in your list of plugins. Then click Settings.

Simple Cache Settings - Screenshot 3

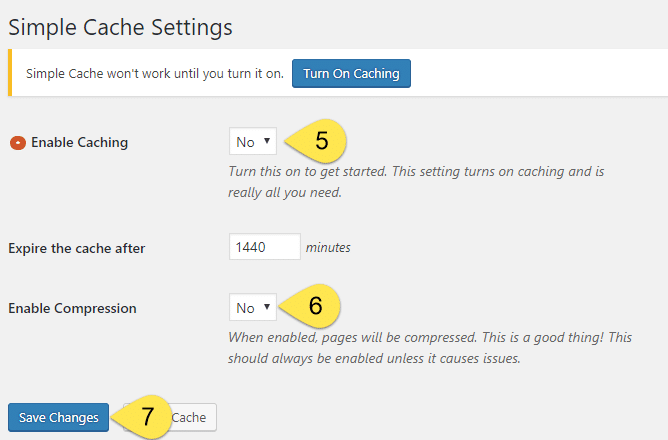
Steps 5 to 7: Now we need to enable caching and enable compression by choosing yes in both dropdowns. Then click Save Changes.

Enable Caching & Compression - Screenshot 4

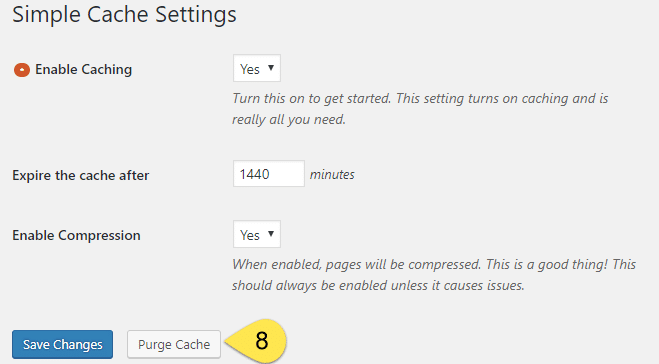
Step 8: The final step is to Purge Cache. As the name suggests, this is definitely the simplest set of steps required to install a caching plugin.

Purge Cache - Screenshot 5

Questions?

If you have any questions about this tutorial on How to Setup Simple Cache, please feel free to ask in the comments below and I will try my best to answer them 🙂