As part of the Speed Study on EWWW, the following steps were completed to setup the EWWW Image Optimizer plugin…

EWWW Tutorial – Step by Step

Step 1: As we currently have Imagify setup, we first need to turn this off by clicking Deactivate. Then we’ll navigate to Add Plugins and search for EWWW.

Step 2: Find the EWWW Image Optimizer plugin in the search results. Click Install Now.

Install EWWW Image Optimizer Plugin - Screenshot 1

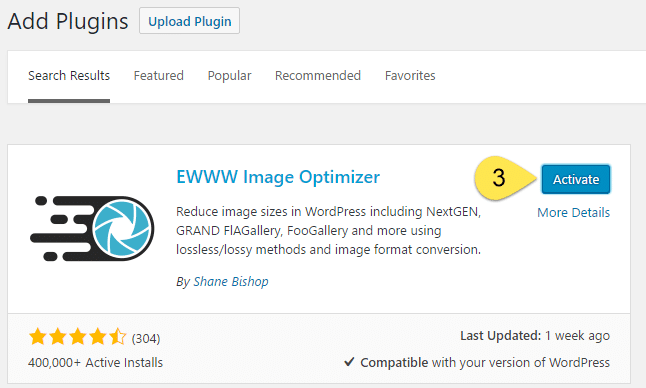
Step 3: Once installed, click Activate.

Activate EWWW Plugin - Screenshot 2

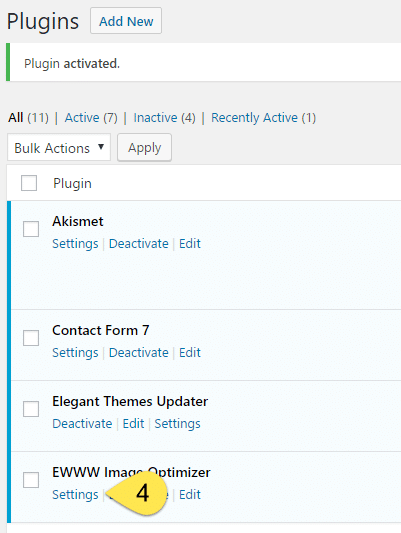
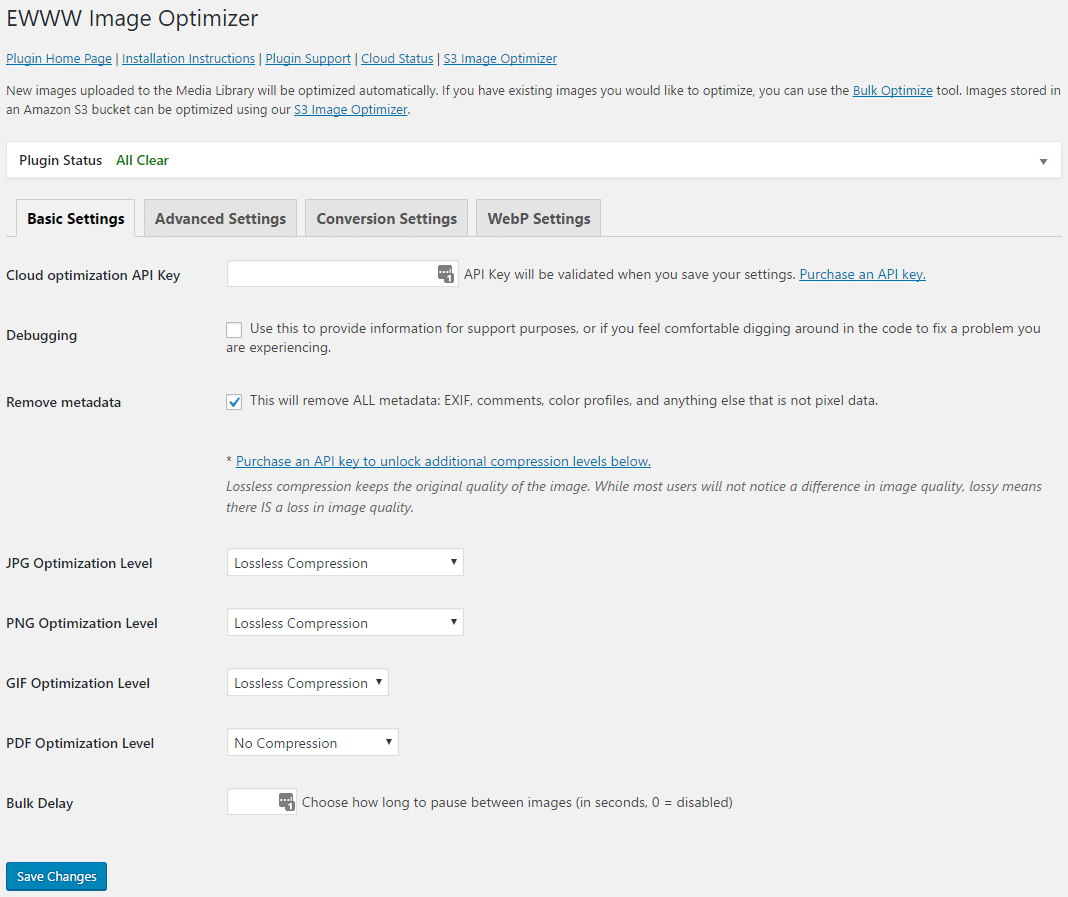
Step 4: Once it’s activated, click through to Settings. We will keep the default options, as shown in the image below.

EWWW Setup - Screenshot 3

EWWW Default Settings

EWWW Default Settings - Screenshot 4

Step 5: We are now ready to start optimizing our images. So let’s go to Media & click Bulk Optimize.

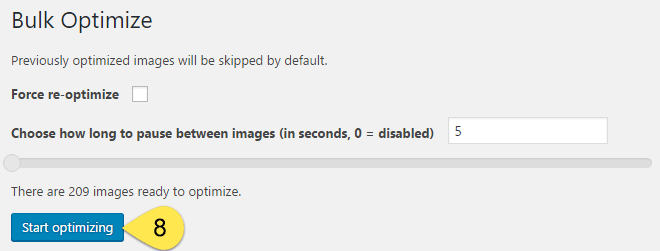
Step 6: Adjust the pause time to 5 seconds. This will reduce the strain on your server, especially if you have a large library of images to optimize.

Step 7: Click Scan for Unoptimized Images.

EWWW Bulk Optimize - Screenshot 5

Step 8: To kick off the bulk-optimize, click Start Optimizing. Be aware that this can be a lengthy process. On the plus side, at least there is an estimate for the time remaining, which seemed fairly accurate.

Start Bulk Optimizing - Screenshot 6

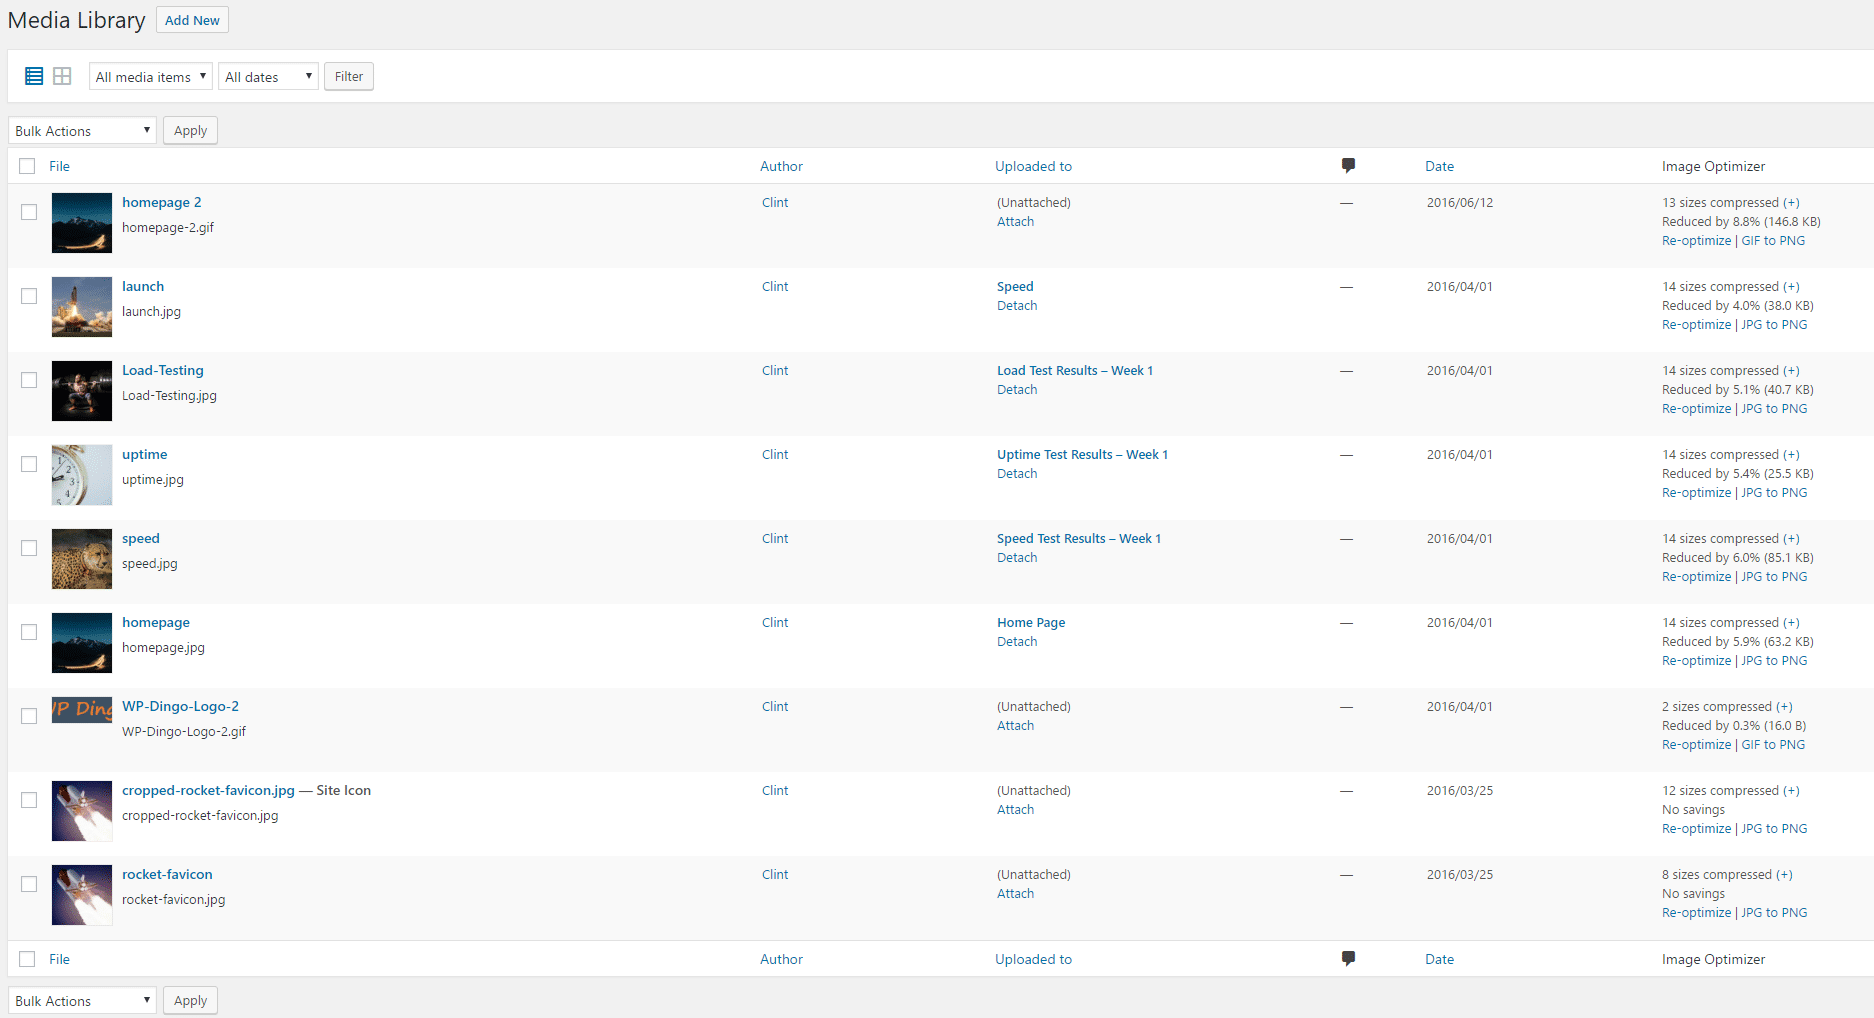
Step 9: Once the bulk optimization of images is complete, click Return to Media Library to see the results.

Bulk Optimize Complete - Screenshot 7

EWWW Image Optimization Results

EWWW Image Optimization Results - Screenshot 8

Questions?

If you have any questions about this EWWW Tutorial, please feel free to ask in the comments below and I will try my best to answer them 🙂