The following steps were completed to setup Comet Cache during the 2018 Speed Study of Comet Cache.

How to Setup Comet Cache – Step by Step

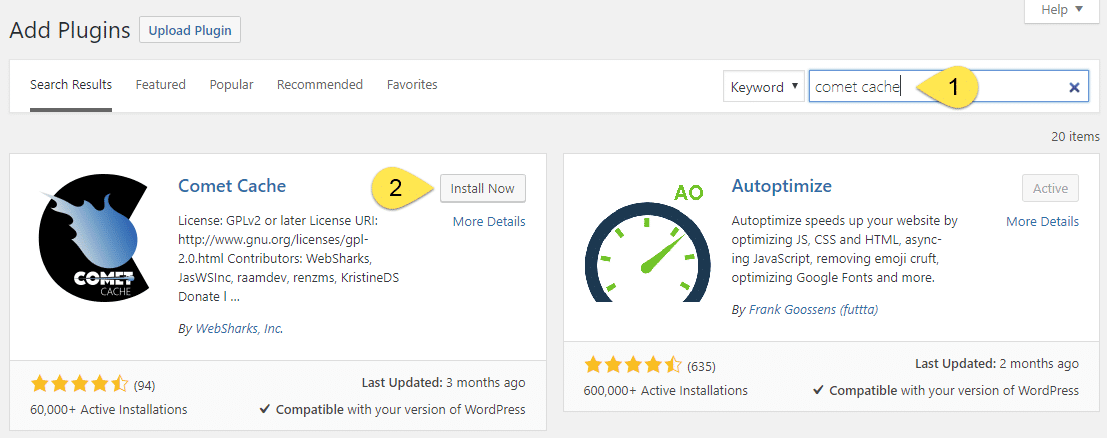
Steps 1 & 2: Let’s start by jumping into our WordPress Dashboard and clicking through to Add New Plugins. In the search bar, type Comet Cache. Then click Install Now.

Install Comet Cache Plugin - Screenshot 1

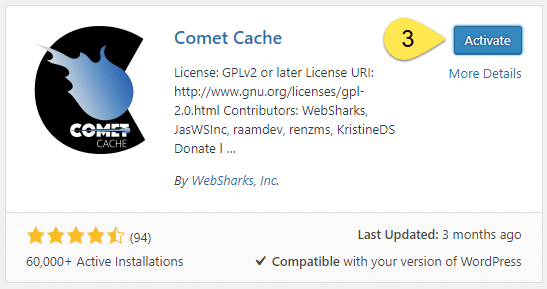
Step 3: Once Comet Cache is installed, click Activate.

Activate Simple Cache - Screenshot 2

Step 4: Find Comet Cache in your list of plugins. Then click Settings.

Comet Cache Settings - Screenshot 3

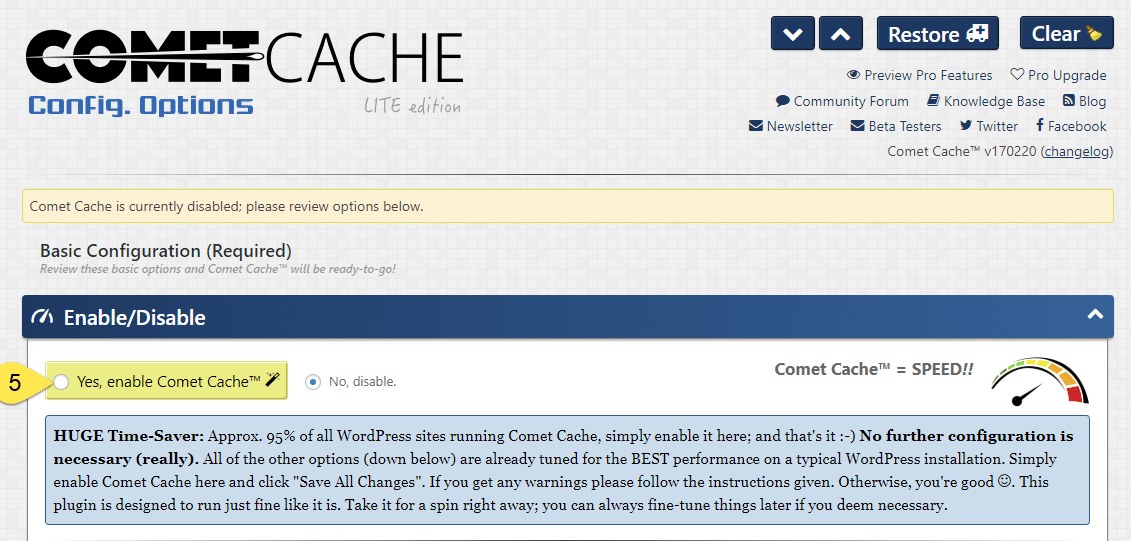
Step 5: Now we need to enable caching by clicking the radio button next to “Yes, enable Comet Cache”. We will follow the advice given that 95% of WordPress sites don’t require any further configuration – which is great news, a super simple installation!!

Enable Caching - Screenshot 4

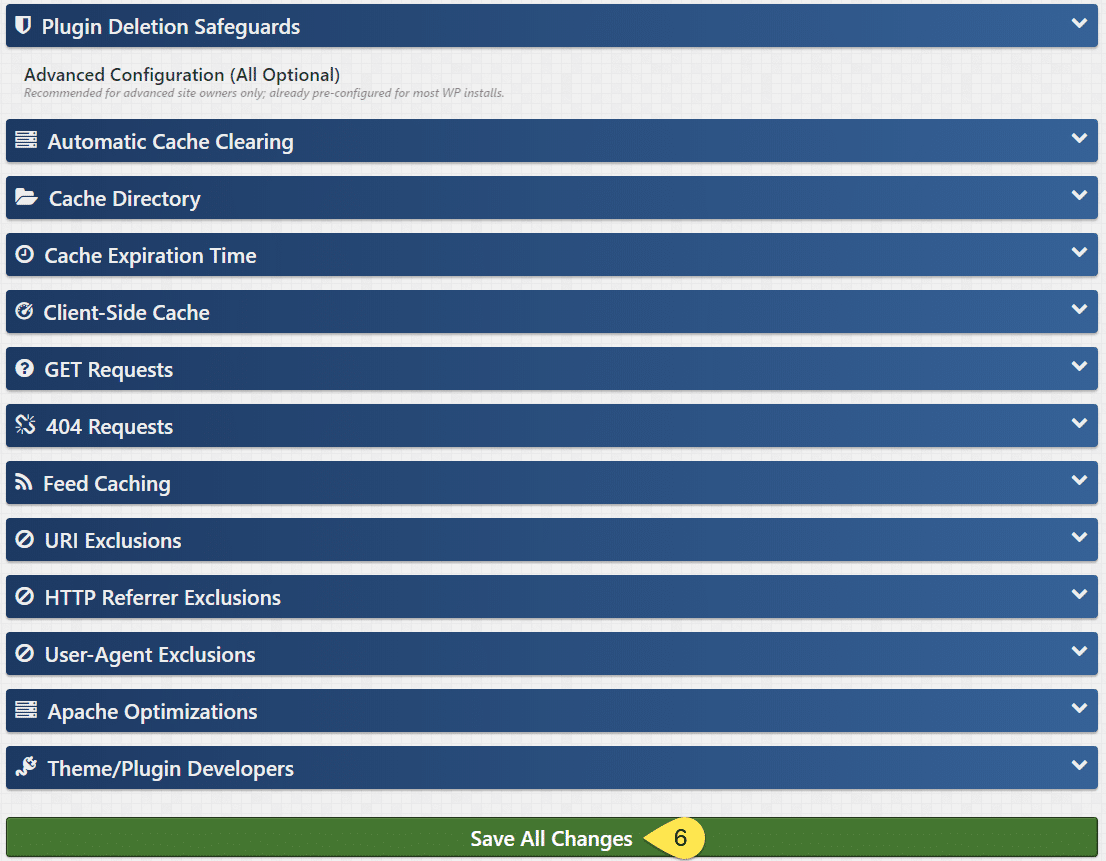
Step 6: Then scroll down to the bottom of the page and click Save All Changes.

Save Cache Settings - Screenshot 5

Step 7: The final step is to clear the cache by clicking the Clear icon.

Clear Cache - Screenshot 6

Questions?

If you have any questions about this tutorial on How to Setup Comet Cache, please feel free to ask in the comments below and I will try my best to answer them 🙂