When it comes to Installing WordPress with a new host, it can pose some problems.

To help guide you through the installation process, we have created a step by step tutorial that shows how we setup InMotion on one of our Live Test Sites (wpdingo.club) in March 2016. We hope you find it beneficial!

How to Install WordPress for InMotion Hosting

Step 1: Choose your hosting plan with InMotion and complete the order. During the order process, in the CMS Auto-Installer section, make sure to select “Install WordPress”.

InMotion Hosting WordPress Installation - Screenshot 1

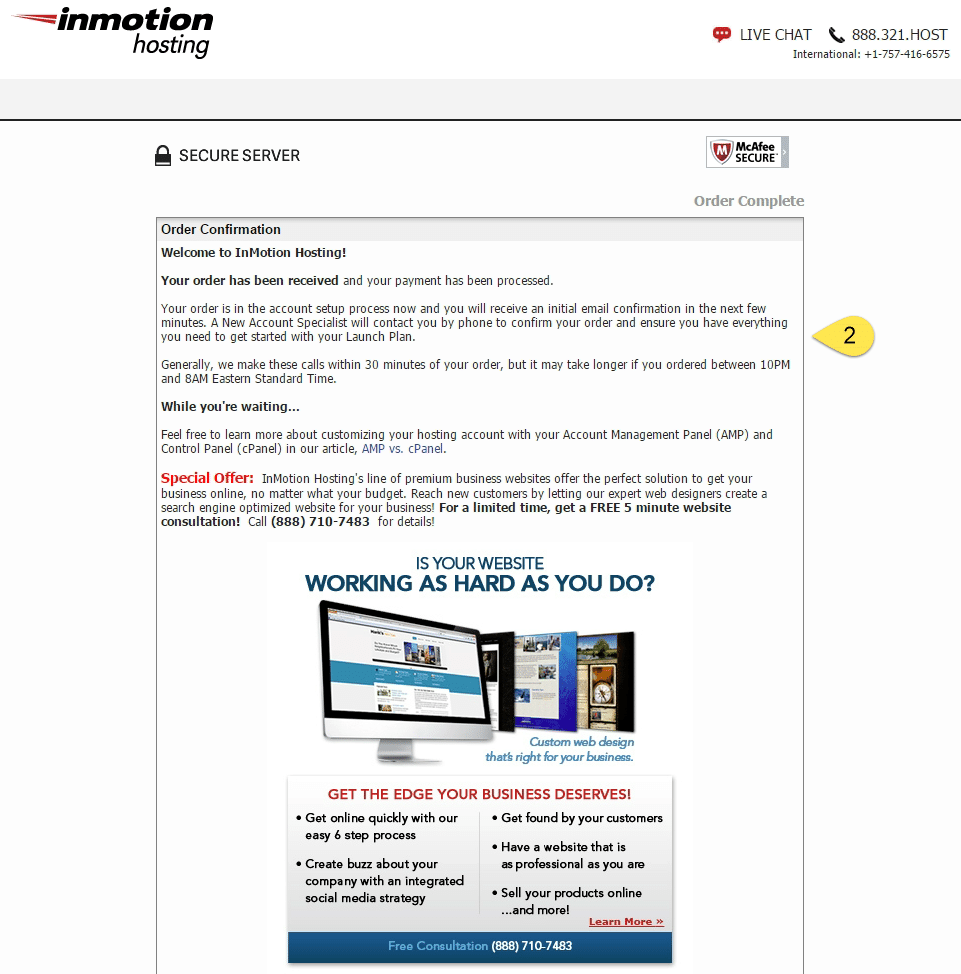
Step 2: Straight after the order has completed, the order confirmation screen is shown below. We need to wait for a phone call to finalise the account setup.

How to Install WordPress for InMotion Hosting - Screenshot 2

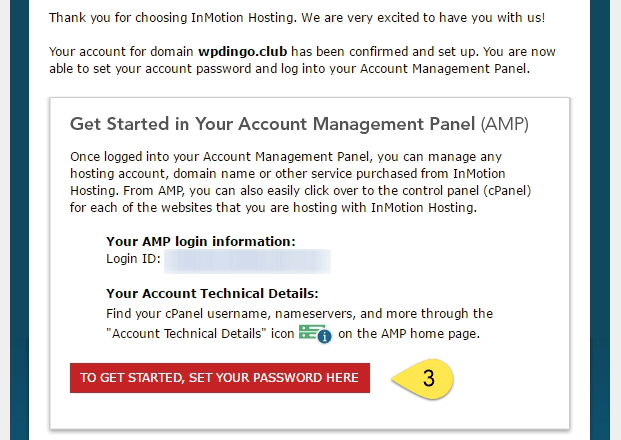
Step 3: Once your account has been activated, the following Welcome to InMotion Hosting email should come through. We need to set our Account Management Panel password (Note: This is different to your WordPress Dashboard password). Click “To get started, set your password here”

WordPress Install InMotion Hosting - Screenshot 3

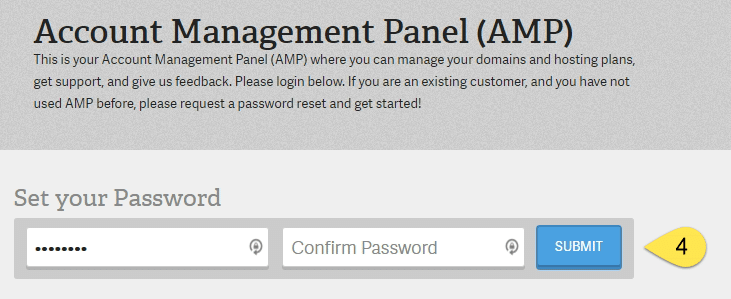
Step 4: Set your password and click Submit. It is recommended to use a password generator to improve your site’s security.

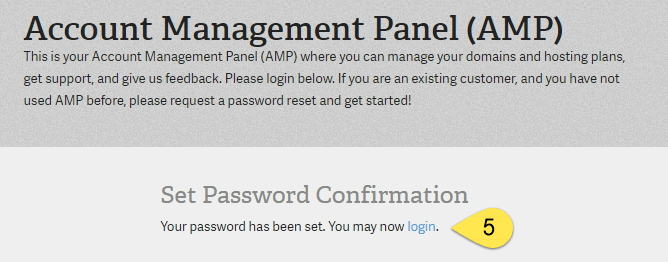
Step 5: Then click Login.

WordPress Installation InMotion Hosting - Screenshot 4
WordPress Installation InMotion Hosting - Screenshot 5

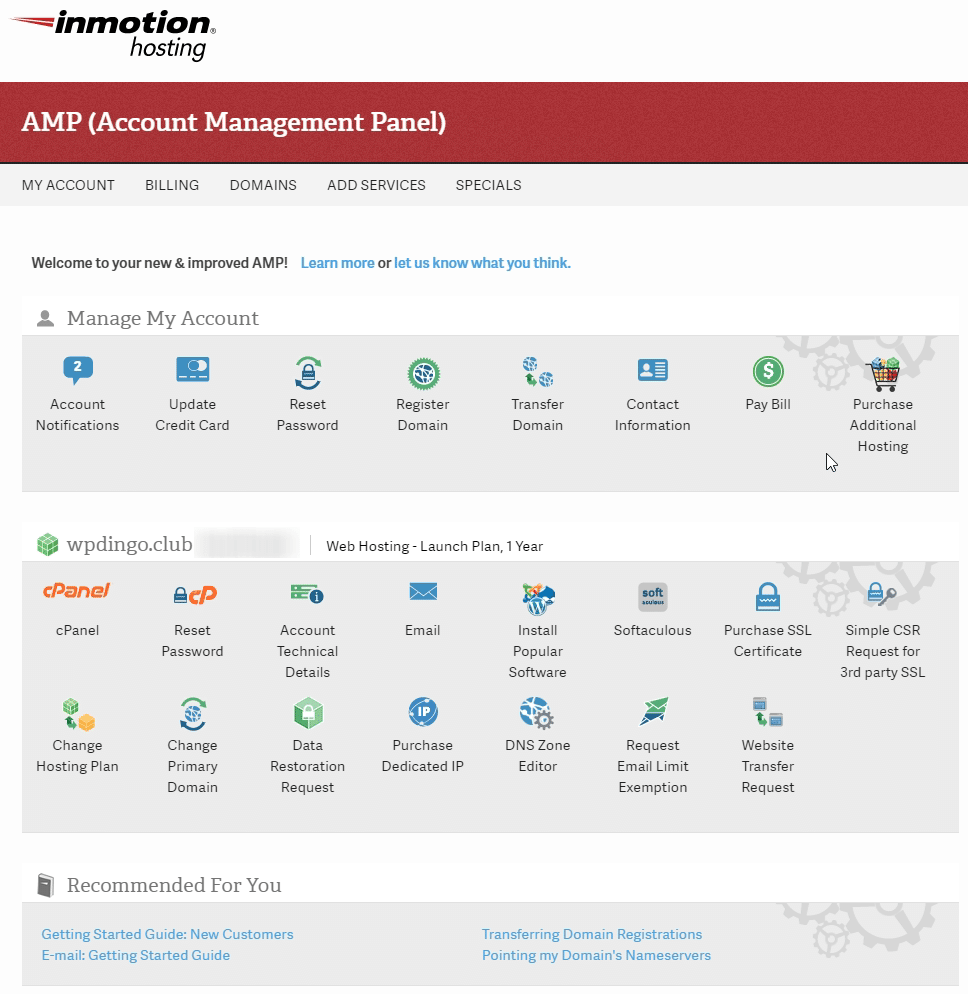
Step 6: Login in to your Account Management Panel using your email and the password you just setup.

WordPress Installation InMotion Hosting - Screenshot 6

Your Account Management Panel is now setup.

WordPress Installation InMotion Hosting - Screenshot 7

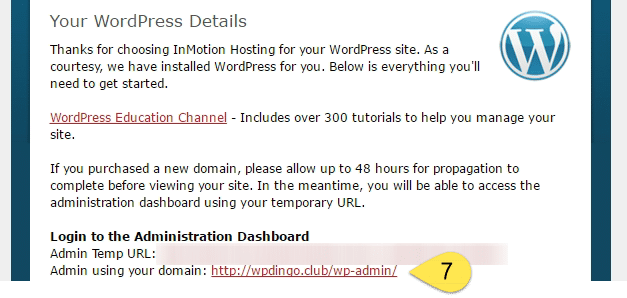
Step 7: Go to your Welcome to InMotion Hosting email and look half way down the email for the WordPress Details. Click on the WordPress Admin link (ending in …/wp-admin/).

Install WordPress Tutorial InMotion Hosting - Screenshot 8

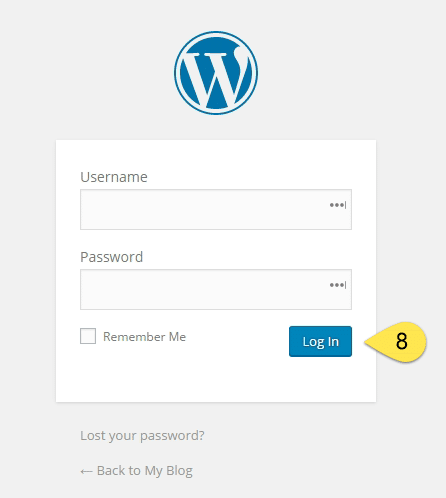
Step 8: You should see a Log In page. Enter your Username & Password from the Welcome email and click Log In.

If your Log In page shows a Coming Soon generic page from your Domain Provider, there’s 2 extra steps below.

Install WordPress Tutorial InMotion Hosting - Screenshot 9

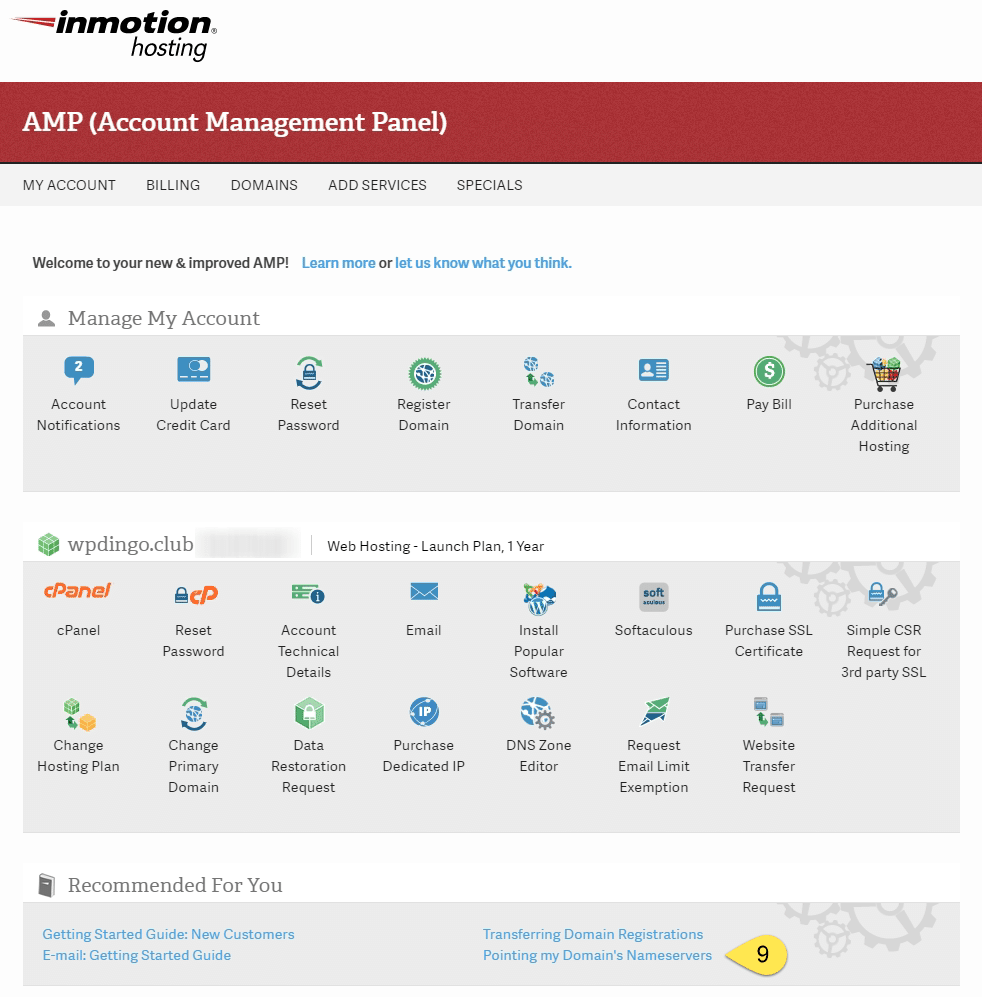
Step 9: (Optional) For those with Coming Soon pages, go to your Account Management Panel and click “Pointing my Domain’s Nameservers”.

Install WordPress Tutorial InMotion Hosting - Screenshot 10

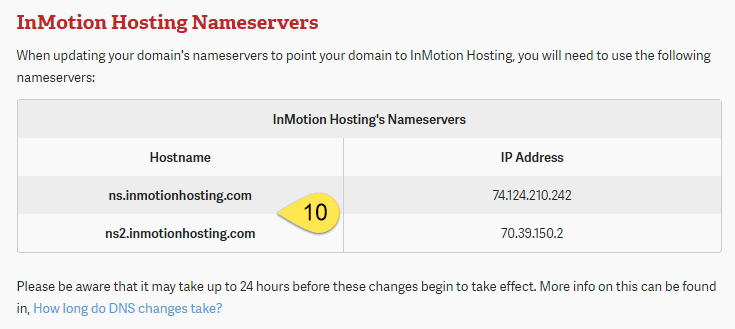
Step 10: (Optional) You will find 2 DNS records (shown below) that need to be added to your Domain Providers Admin Portal.

Look for Nameservers, and replace the existing records (which are usually ns1.yourdomainprovider.com & ns2.yourdomainprovider.com etc.) with the 2 InMotion records.

Please be aware that changes to DNS records can take up to 24-48 hours, so unfortunately, you might see the coming soon page for a little while.
InMotion Hosting Install WordPress Tutorial - Screenshot 11

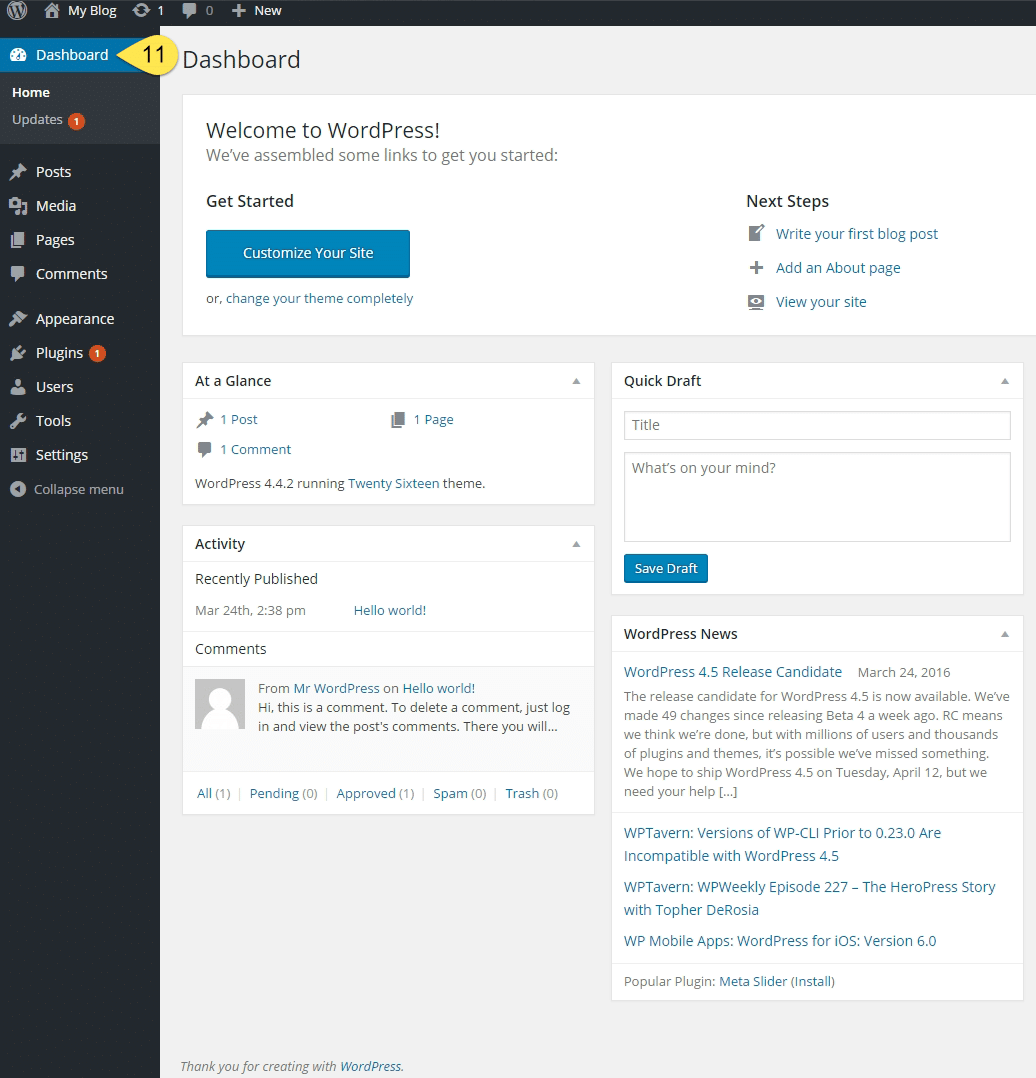
Step 11: Our WordPress Installation is now complete. We are now looking at the WordPress Dashboard.

You are now all set to start creating your website – Enjoy!!

InMotion Hosting WordPress Installation Tutorial - Screenshot 12

Questions?

If you have any questions about this tutorial on How to Install WordPress for InMotion Hosting, please feel free to ask in the comments below and I will try my best to answer them 🙂