Let’s work our way through the maze to install WP with Bluehost.

Below is a step by step tutorial that shows how we setup Bluehost on one of our Live Test Sites (wpdingo.click) in March 2016. We hope you find it beneficial!

How to Install WordPress for Bluehost

Step 1: Choose your hosting plan with Bluehost and complete the order.

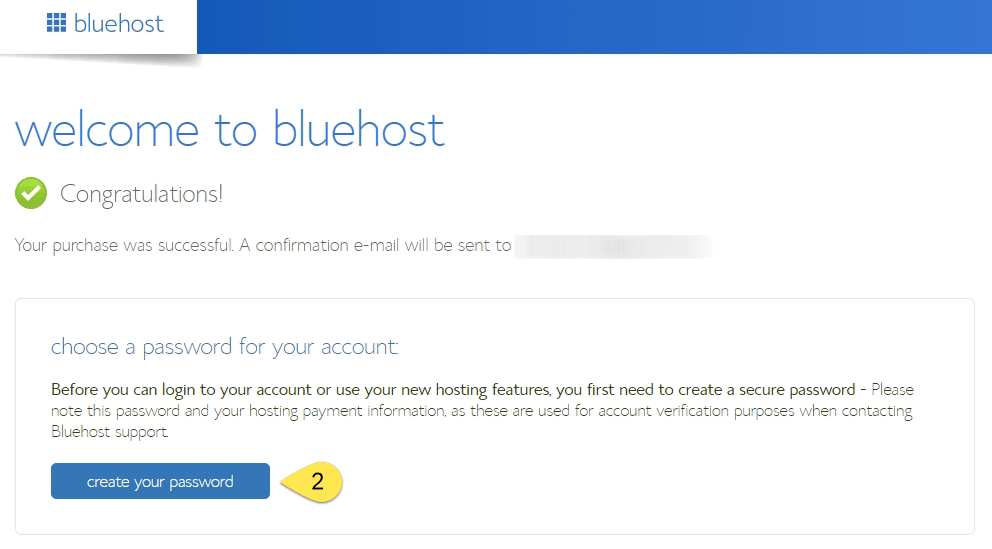
Step 2: Straight after the order has completed, the following Welcome screen is displayed. Looks like we need to setup a password, so let’s click “Create your Password”.

Bluehost WordPress Installation - Screenshot 1

Step 3: Use the Password Generator to setup a strong password to improve the security of your site.

Step 4: Click Continue.

How to Install WordPress for Bluehost - Screenshot 2

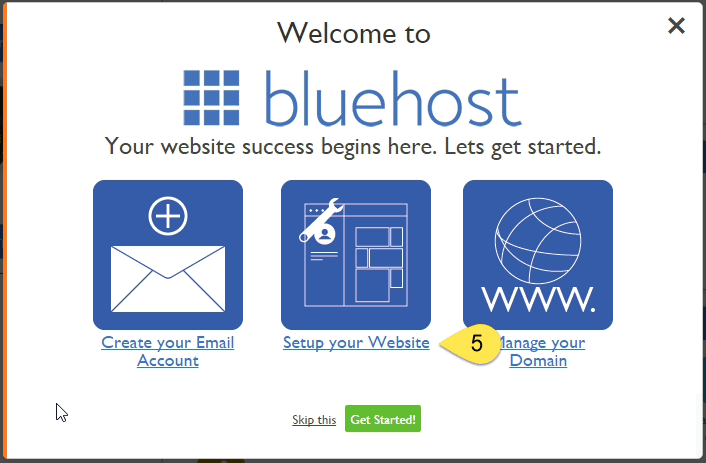
Step 5: We are now presented with a popup screen. Let’s click “Setup your Website”.

WordPress Install Bluehost - Screenshot 3

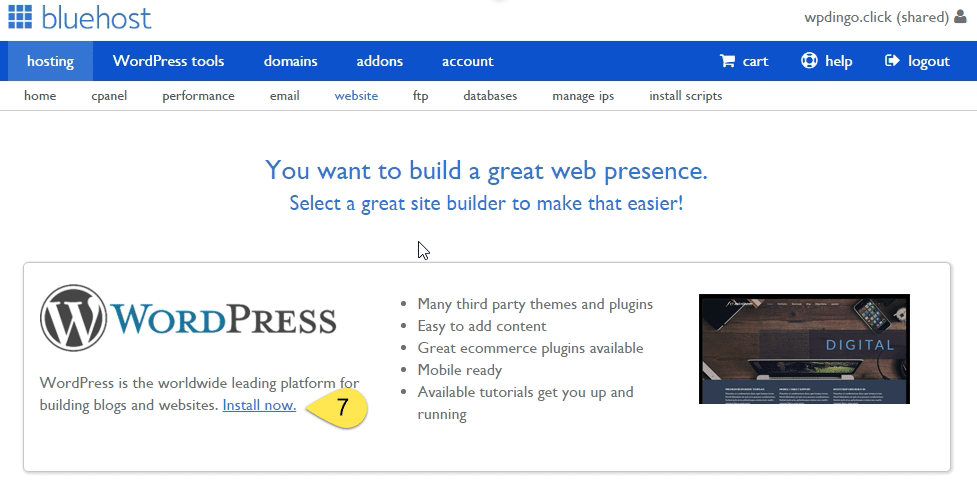
Step 6: Then click Website.

Step 7: And then click Install Now.

WordPress Installation Bluehost - Screenshot 4
WordPress Installation Bluehost - Screenshot 5

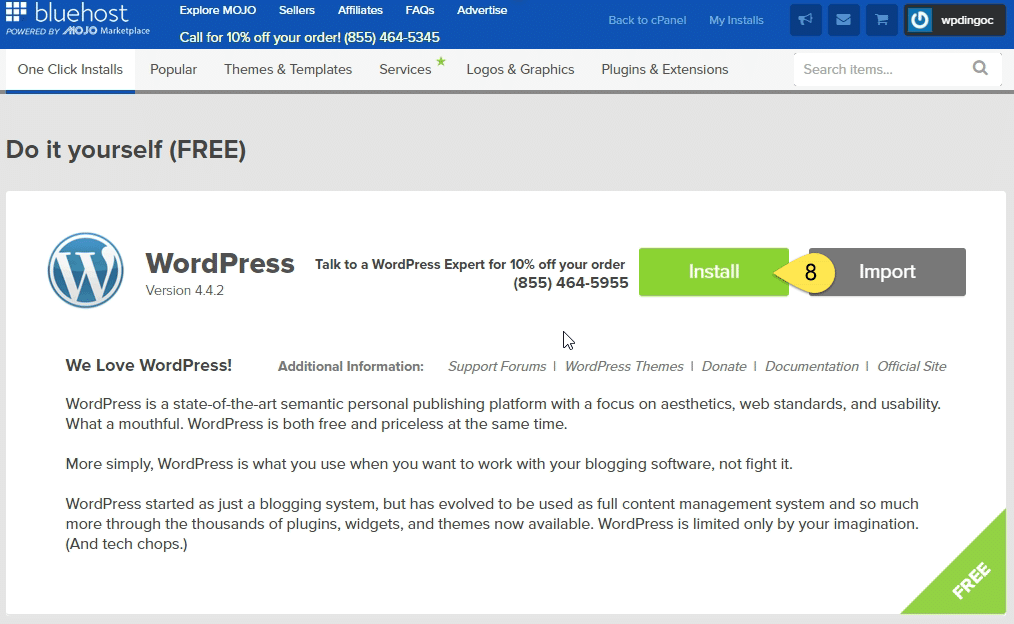
Step 8: Within the Do it yourself Free section, click Install.

WordPress Installation Bluehost - Screenshot 6

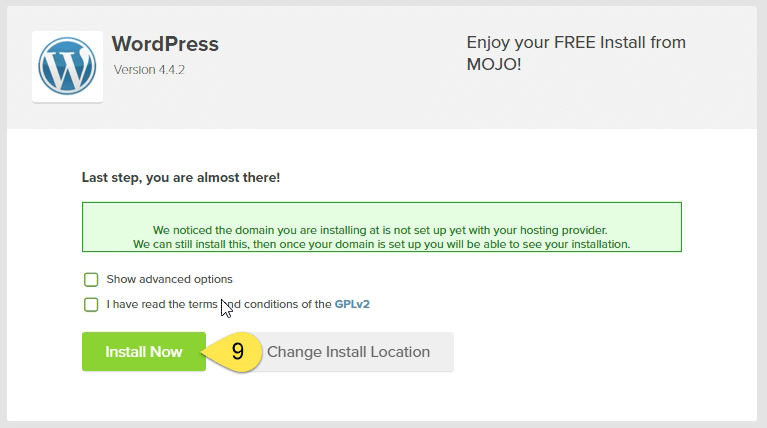
Step 9: Confirm the advanced options are to your liking, then click Install Now.

WordPress Installation Bluehost - Screenshot 7

Step 10: There is an option to purchase a premium theme. We will install our premium theme later, so for now, click “No thanks, I am (or know) a web designer”. Note: You don’t need to be a web designer to choose this path.

Install WordPress Tutorial Bluehost - Screenshot 8

Step 11: Keep an eye out for the following banner to appear at the top of your screen, indicating the install is complete. Then click View Credentials.

Install WordPress Tutorial Bluehost - Screenshot 9

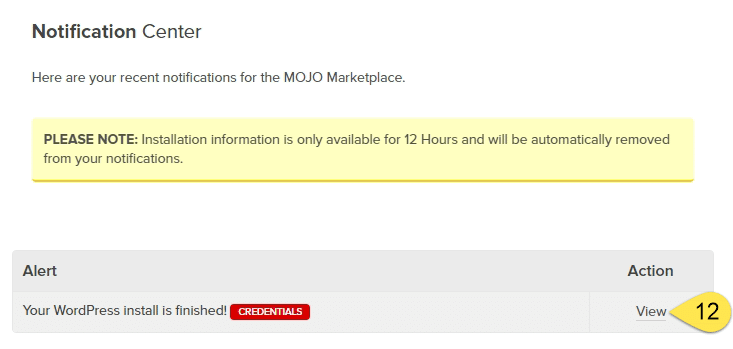
Step 12: Click View.

Install WordPress Tutorial Bluehost - Screenshot 10

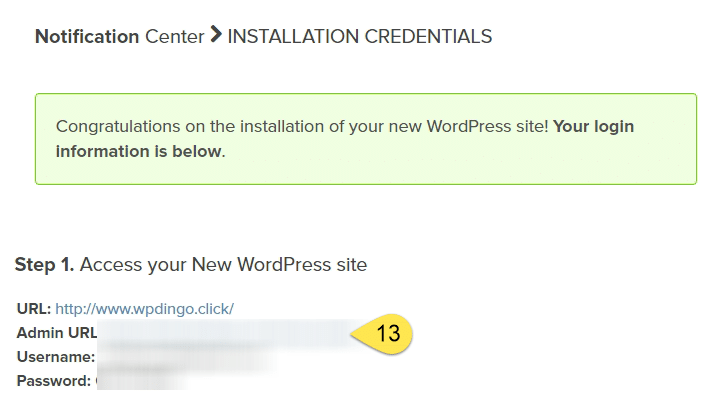
Step 13: To navigate to your WordPress login page, click the Admin URL link.

Install WordPress Tutorial Bluehost - Screenshot 11

Step 14: Enter your Username and Password from Step 13 and click Log In.

If your Log In page shows a Coming Soon generic page from your Domain Provider, there’s an extra step below.

Install WordPress Tutorial Bluehost - Screenshot 12

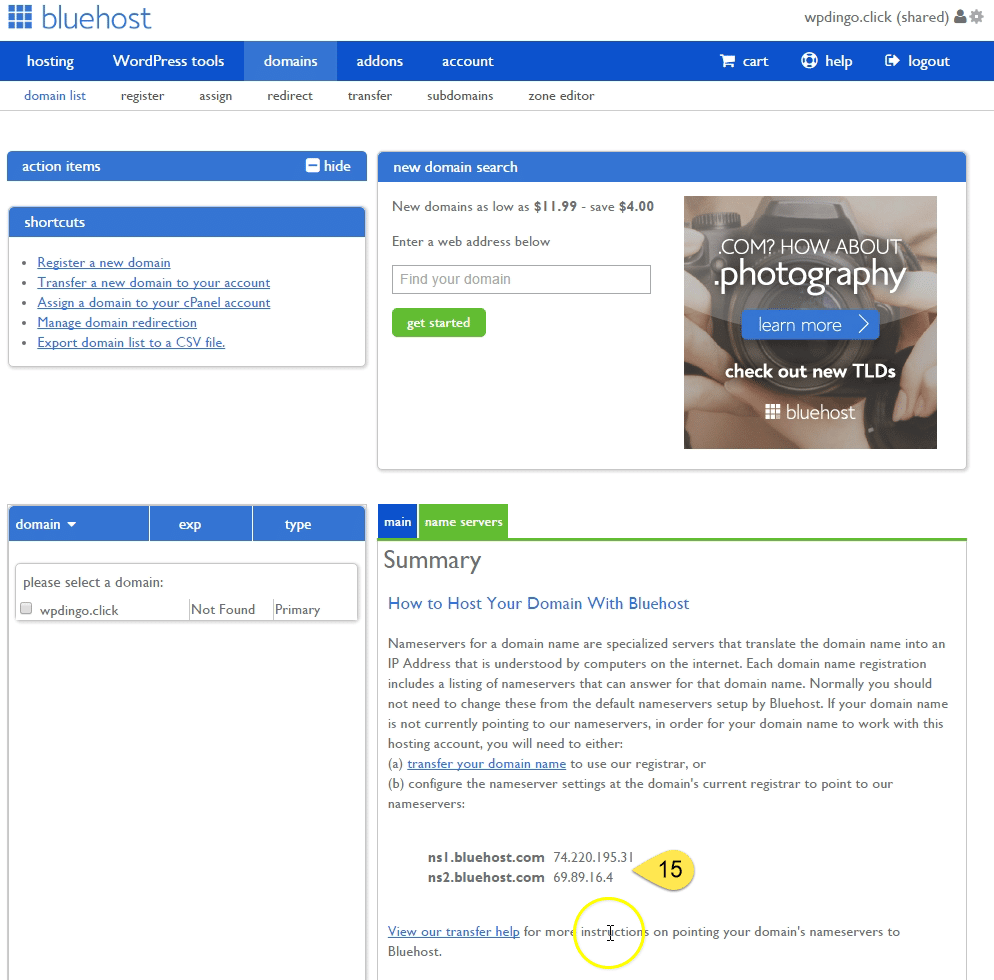
Step 15: (Optional) For those with Coming Soon pages, you will find 2 DNS records (shown below from the Domains screen of the Bluehost admin area) that need to be added to your Domain Providers Admin Portal.

Look for Nameservers, and replace the existing records (which are usually ns1.yourdomainprovider.com & ns2.yourdomainprovider.com etc.) with the 2 Bluehost records.

Please be aware that changes to DNS records can take up to 24-48 hours, so unfortunately, you might see the coming soon page for a little while.

Install WordPress Tutorial Bluehost - Screenshot 13

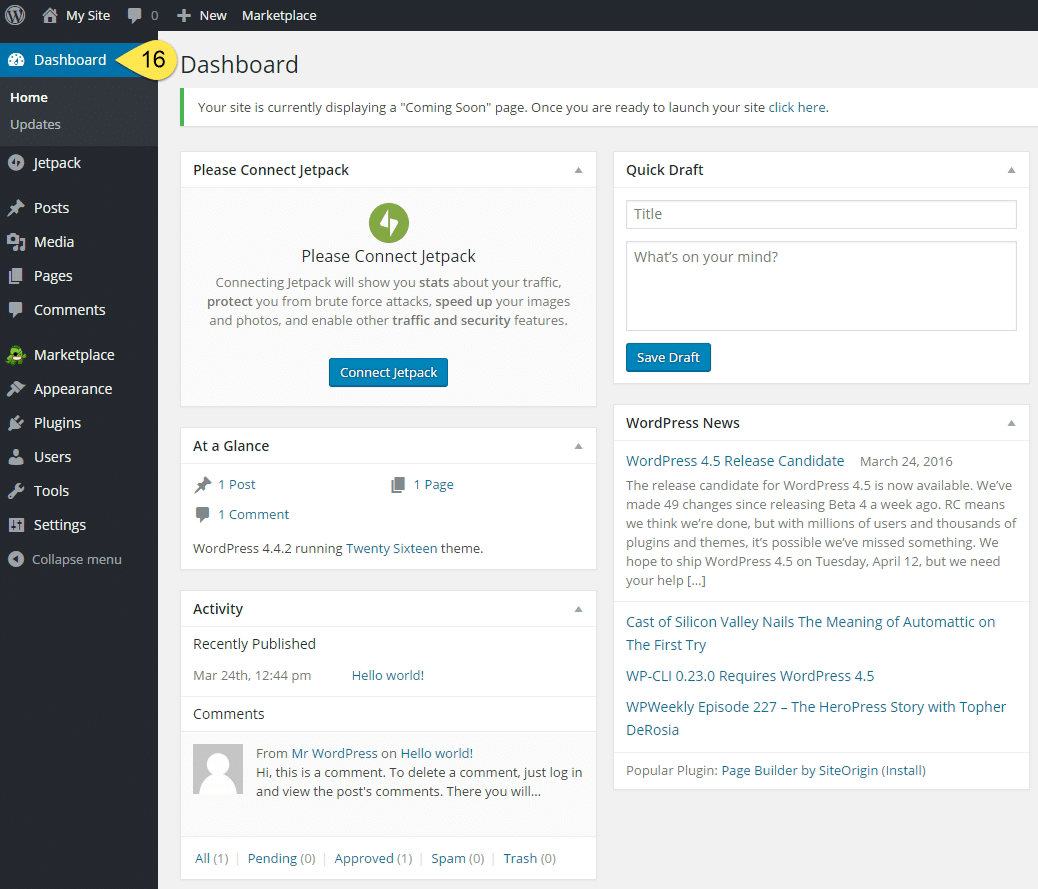
Step 16: Our WordPress Installation is now complete. We are now looking at the WordPress Dashboard.

You are now all set to start creating your website – Enjoy!!

Bluehost WordPress Installation Tutorial - Screenshot 14

Questions?

If you have any questions about this tutorial on How to Install WordPress for Bluehost, please feel free to ask in the comments below and I will try my best to answer them 🙂