The following steps were completed to setup WP Fastest Cache during the 2018 Speed Study of WP Fastest Cache Cache.

How to Setup WP Fastest Cache – Step by Step

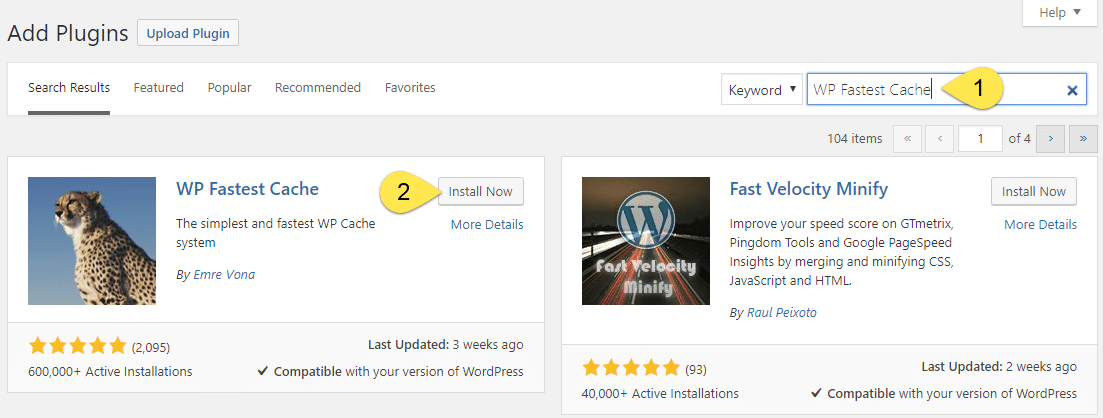
Steps 1 & 2: Let’s start by jumping into our WordPress Dashboard and clicking through to Add New Plugins. In the search bar, type WP Fastest Cache. Then click Install Now.

Install WP Fastest Cache Plugin - Screenshot 1

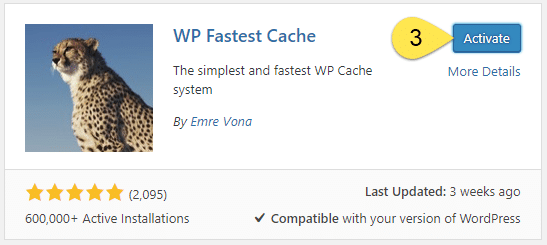
Step 3: Once WP Fastest Cache is installed, click Activate.

Activate WP Fastest Cache - Screenshot 2

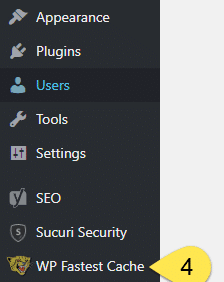
Step 4: Click WP Fastest Cache from within your WordPress Side Menu.

WP Fastest Cache Settings - Screenshot 3

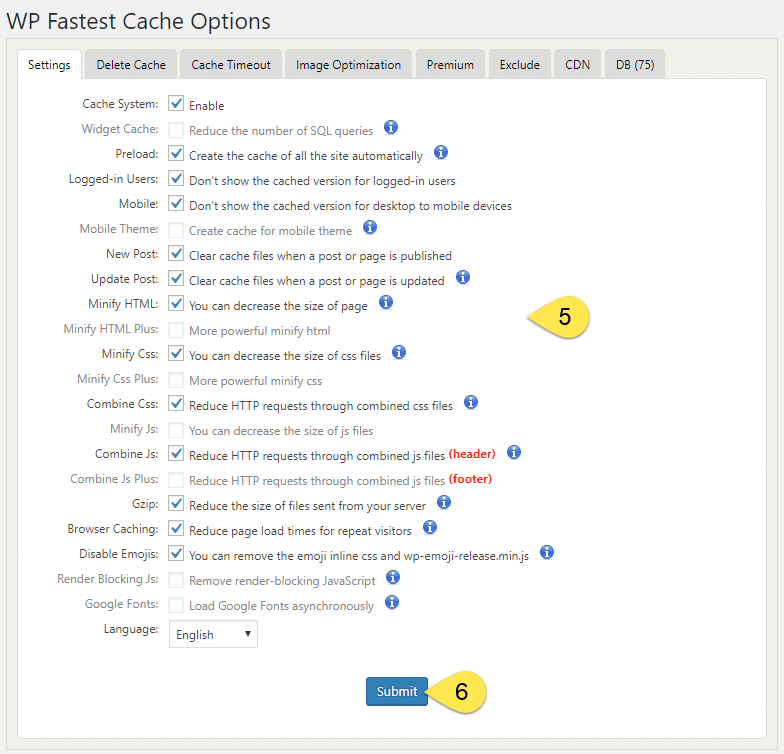
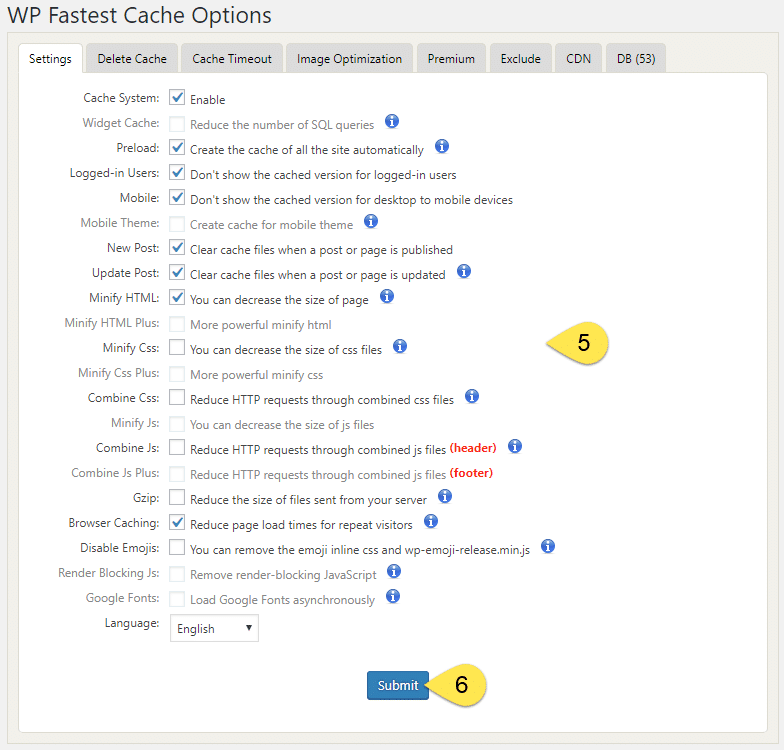
Steps 5 & 6: Now we need to enable caching by checking Enable alongside Caching system. Then check all other optimization options that are available within the free version. Note: The grayed out options are premium options (USD$39.99 one time fee). Then click Submit.

Enable Caching & Choose Settings - Screenshot 4

Updated Settings

New Steps 5 & 6: Following the 1st week of testing with the above settings, the speeds were ridiculously slow. From a close review, it looks as though there were clashes, so I’ve turned off a number of features:

  • Minify CSS
  • Combine CSS
  • Combine JS
  • Gzip
  • Disable Emojis
Updated Settings - Screenshot 6

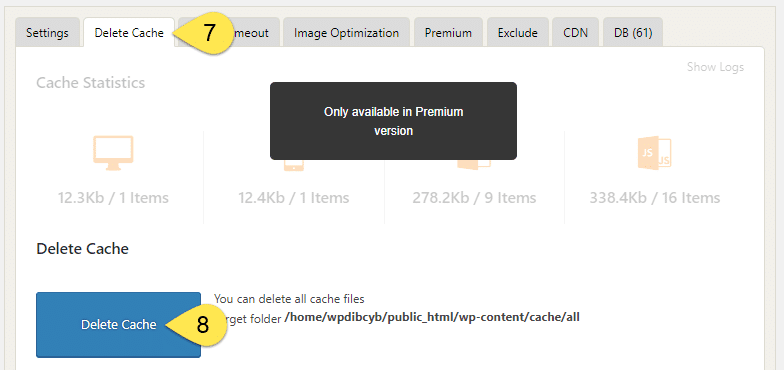
Steps 7 & 8: The final step is to clear the cache by clicking the Delete Cache sub-menu, then the Delete Cache button.

Clear Cache - Screenshot 5

Questions?

If you have any questions about this tutorial on How to Setup WP Fastest Cache, please feel free to ask in the comments below and I will try my best to answer them 🙂