Installing WordPress with a new host can present some challenges.
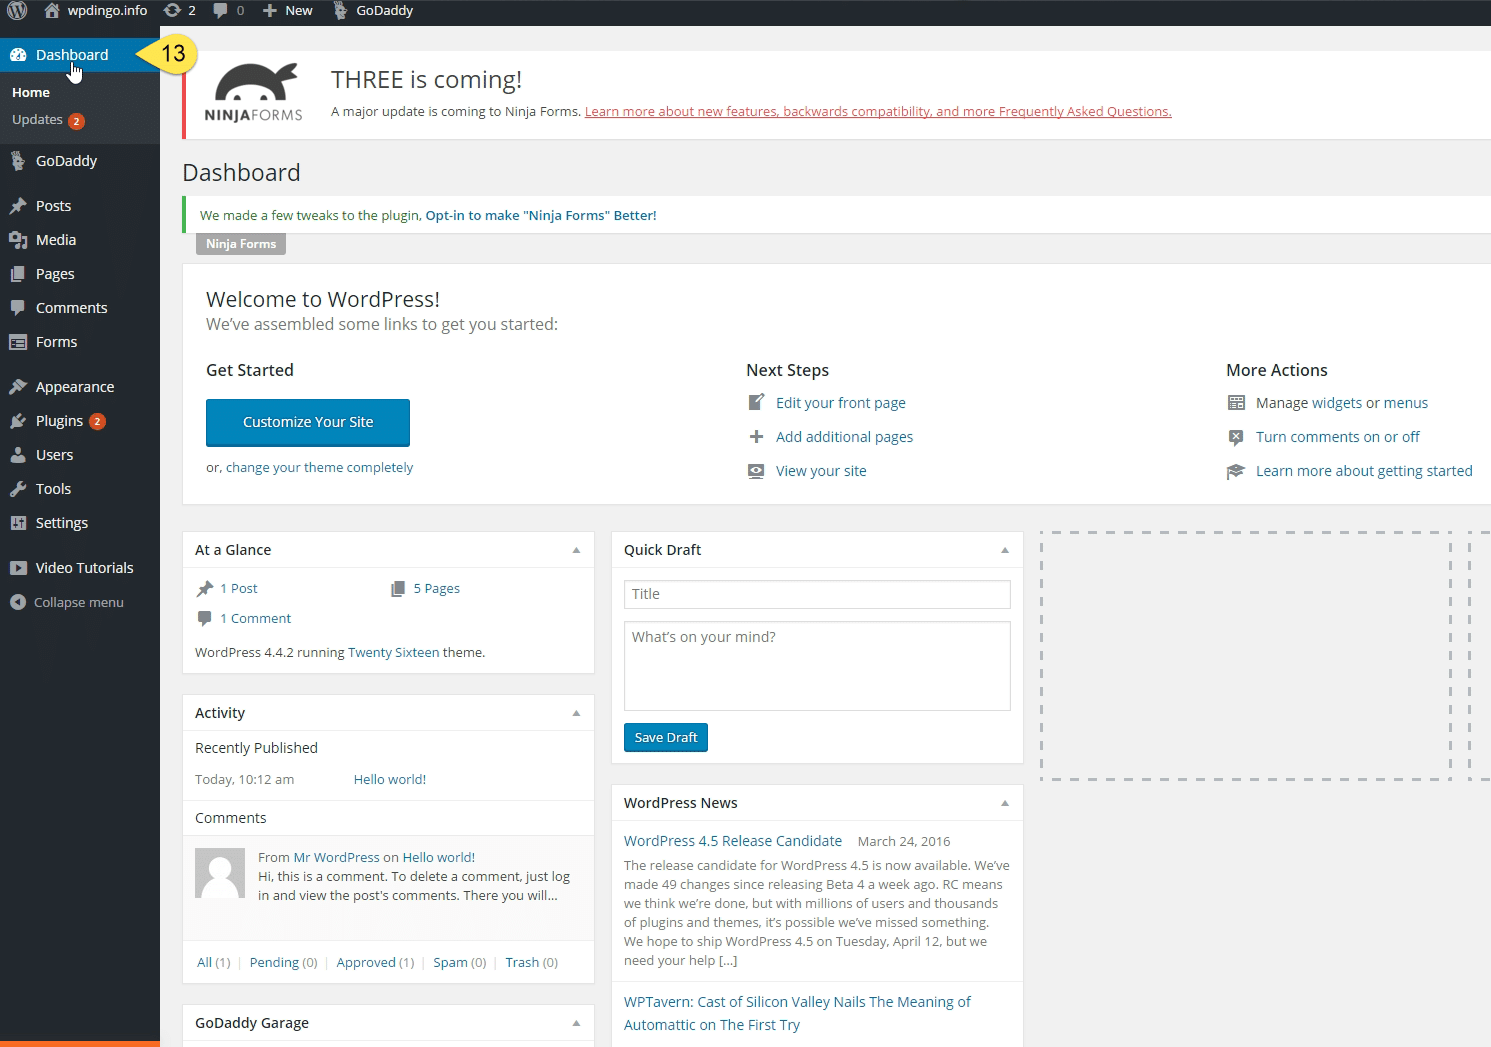
To help guide you through the installation process, we have created a step by step tutorial that shows how we setup GoDaddy on one of our Live Test Sites (wpdingo.info) in March 2016. We hope you find it beneficial!
How to Install WordPress for GoDaddy
Step 1: Choose your hosting plan with GoDaddy and complete the order process.
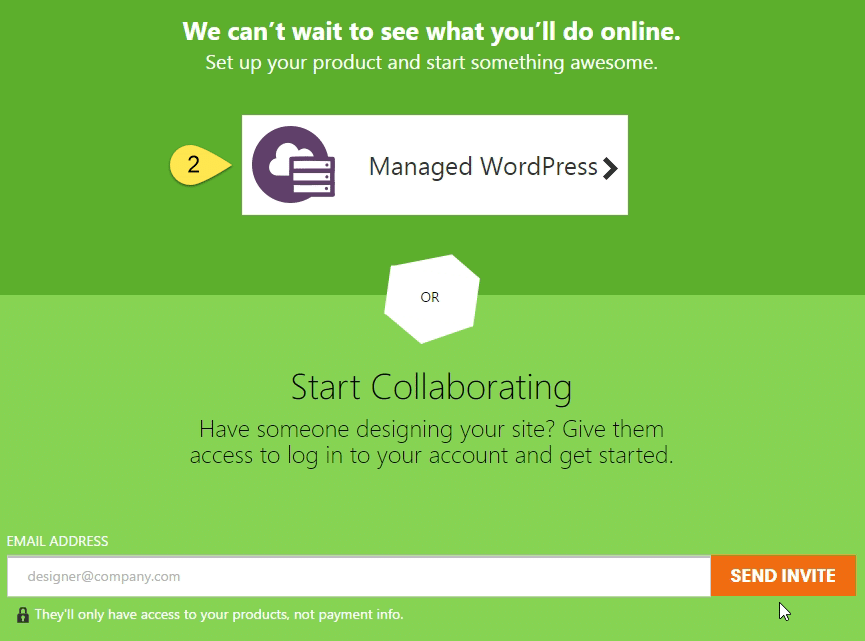
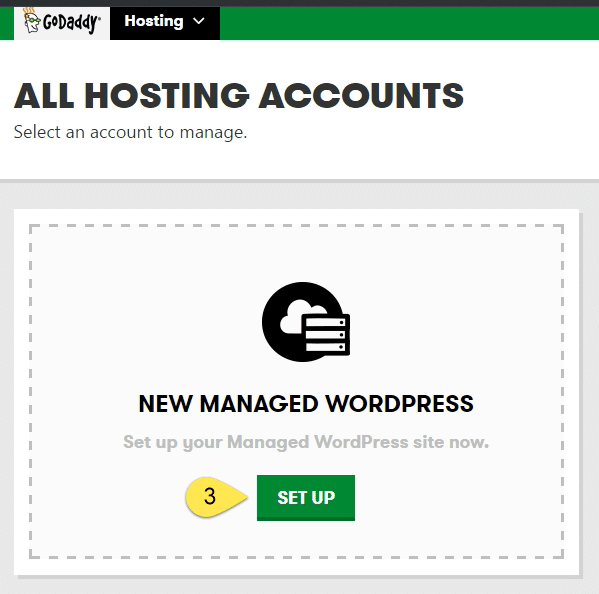
Step 2: Straight after the order has completed, the first screen that pops up is shown below. Click “Managed WordPress”.
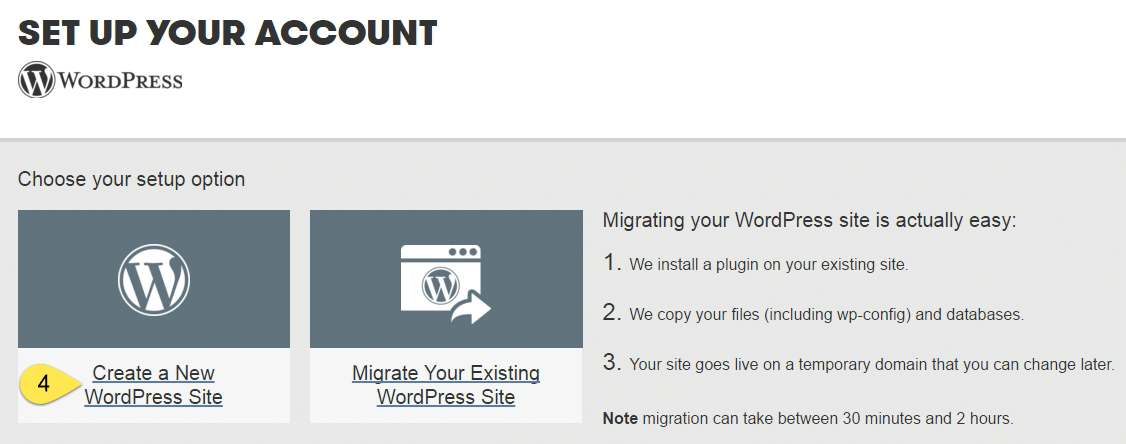
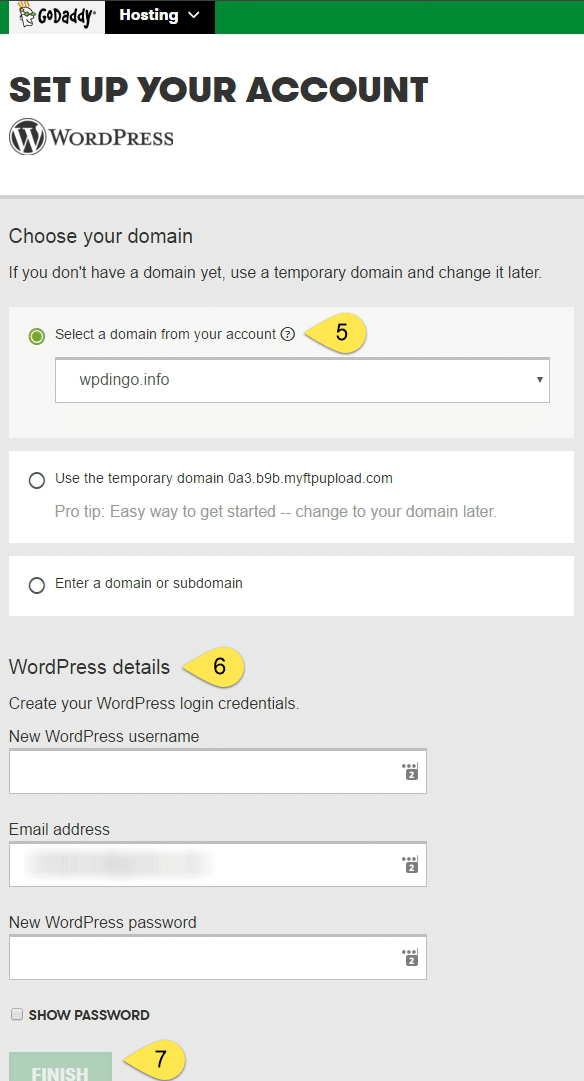
Step 5: Choose the appropriate path for your domain. For us, we had setup a domain with GoDaddy earlier, so we’ll select a domain from our account (in this case wpdingo.info).
Step 6: And then, its time to setup a username, email and password which will be used when we login into our WordPress account.
To improve security, it is highly recommended to use a password generator for both.
Step 7: Click Finish
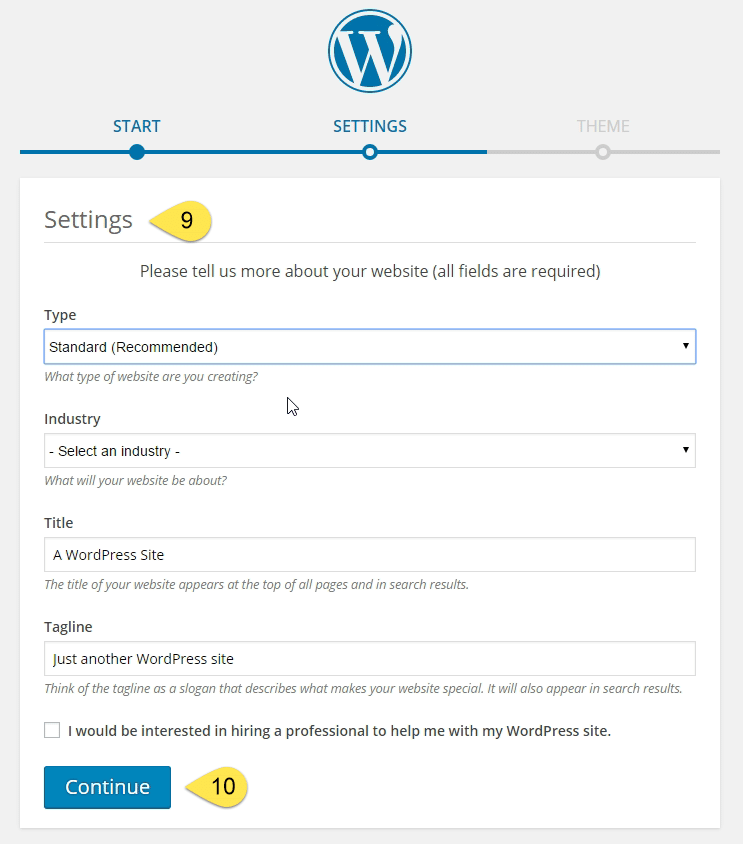
Step 9: Complete the 4 sections:
1. For type, choose Standard (Recommended).
2. Select the most appropriate Industry for your site.
3.&4. (Optional) Update the Title & Tagline that suits the site your going to setup. The reason its optional is because you can change this at any time from your WordPress Dashboard.
Step 10: Click Continue.
Questions?
If you have any questions about this tutorial on Installing WordPress with GoDaddy, please feel free to ask in the comments below and I will try my best to answer them 🙂




 Hi, I'm Clint!


