The following steps were completed to setup WP Super Cache & Cloudflare for the 2016 Speed Study on CloudFlare & WP Super Cache, the 2017 WP Super Cache Speed Study and the 2018 WP Super Cache Speed Study.


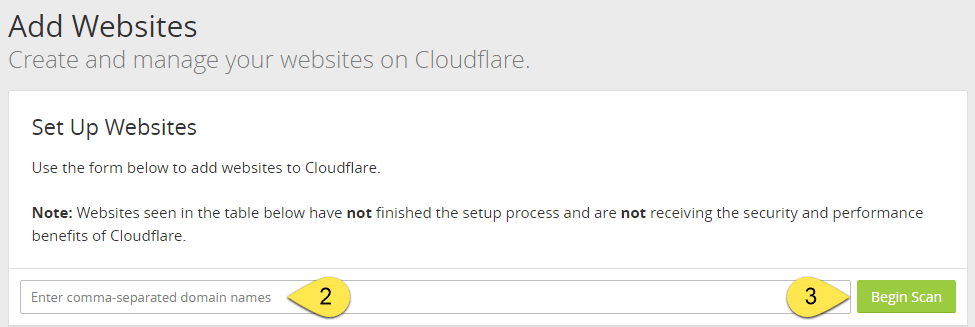
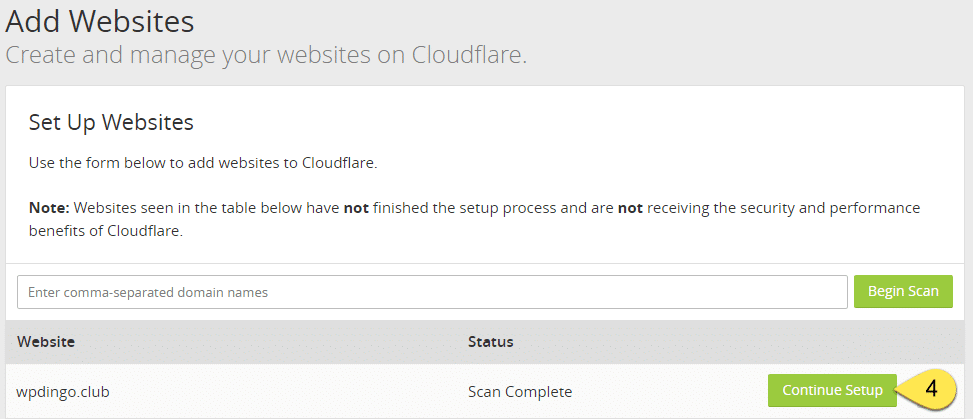
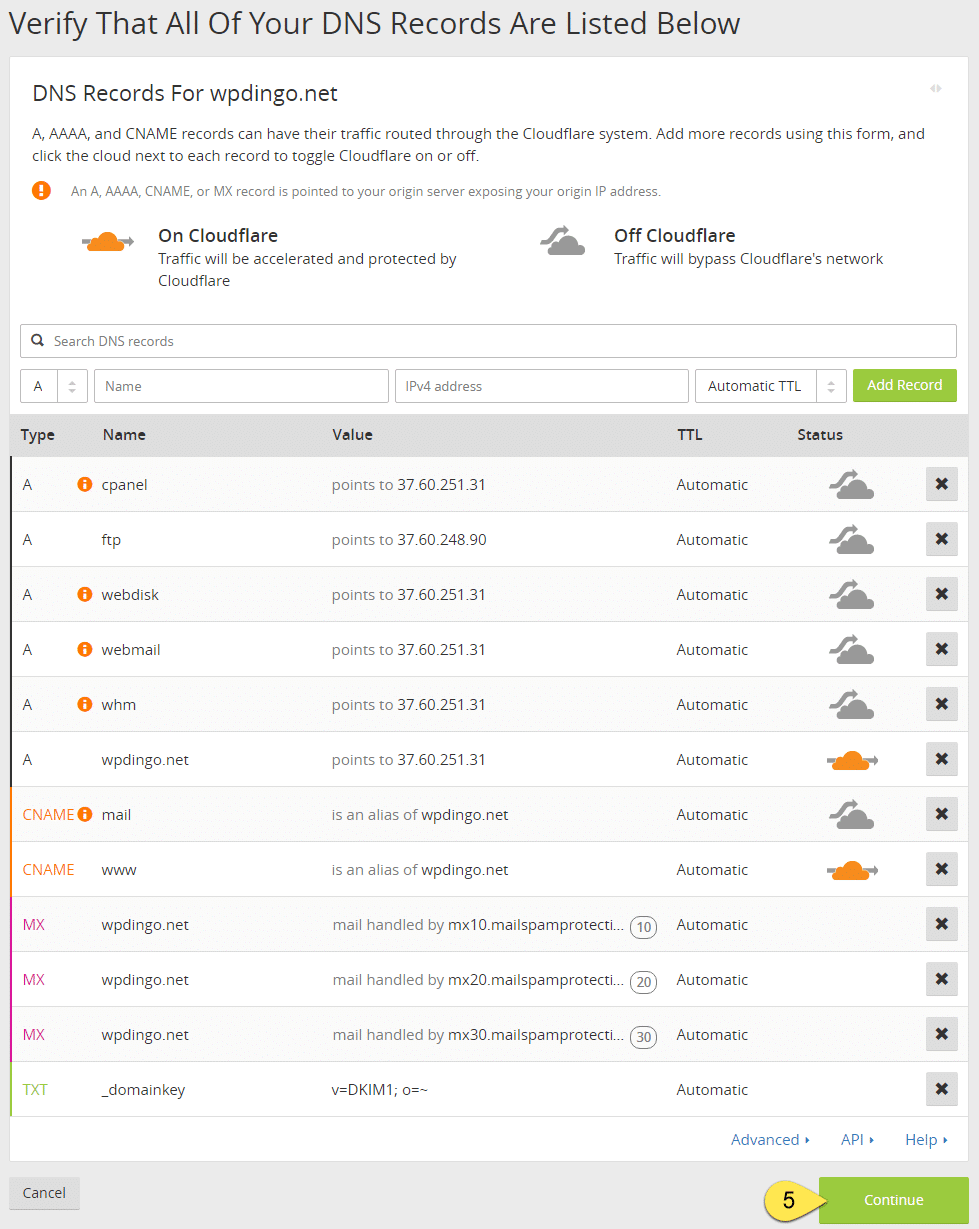
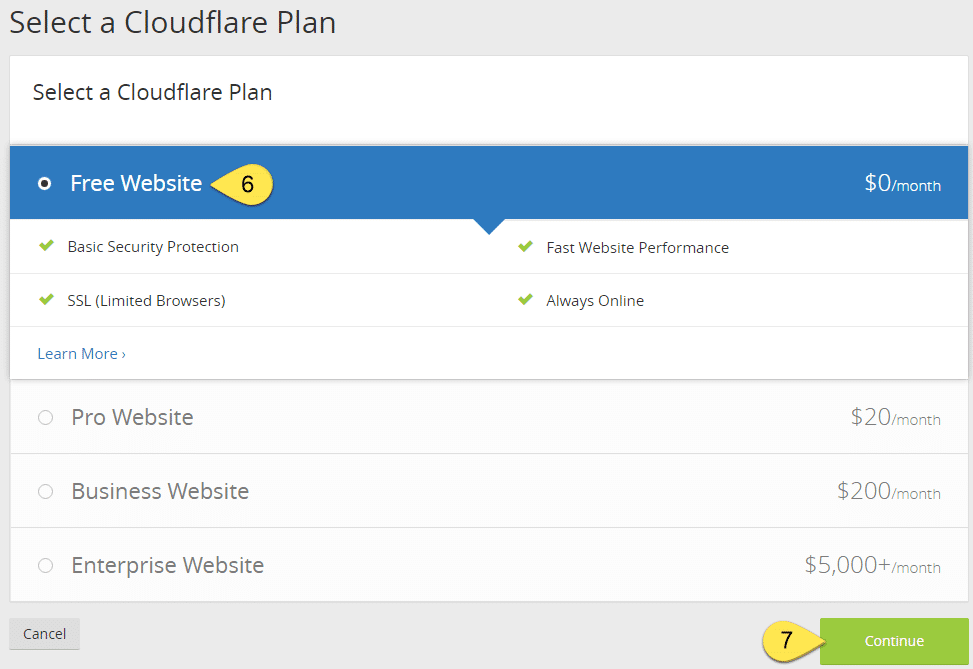
How to Setup CloudFlare – Step by Step
Step 1: First up, we need to get an account setup with CloudFlare. After signing up and activating through email, click through to Add Site.
WP Super Cache Integration
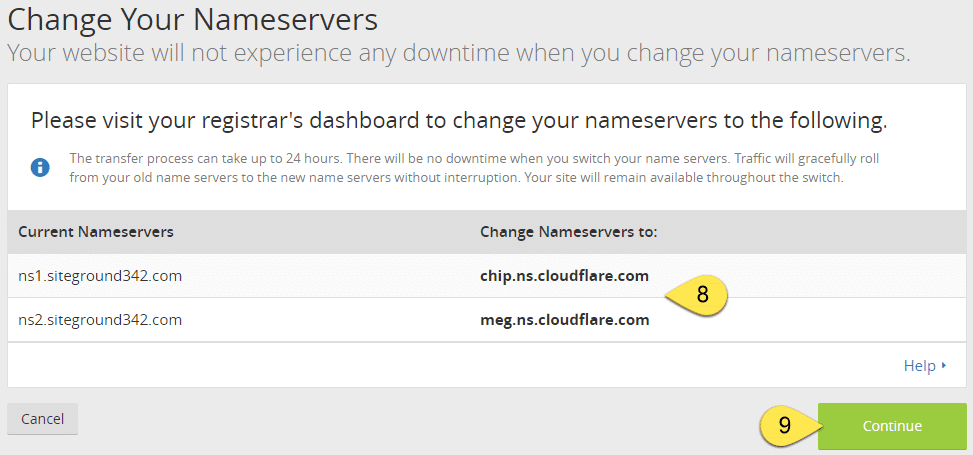
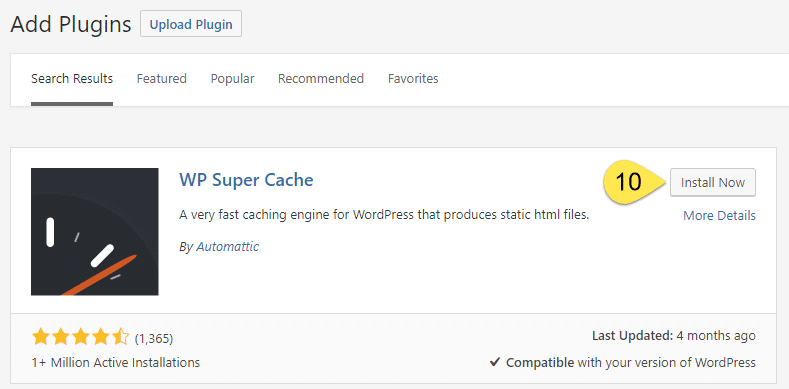
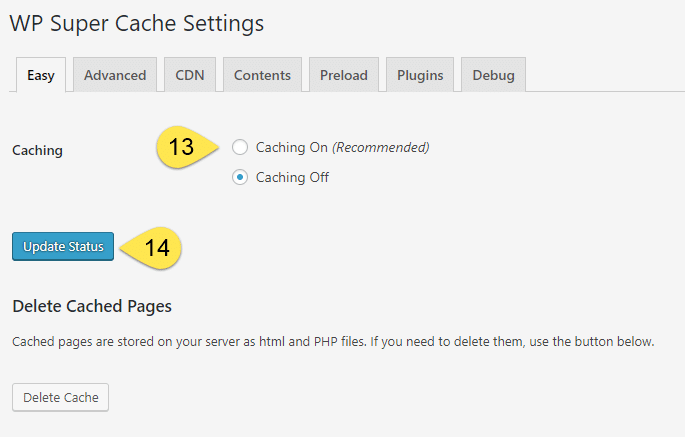
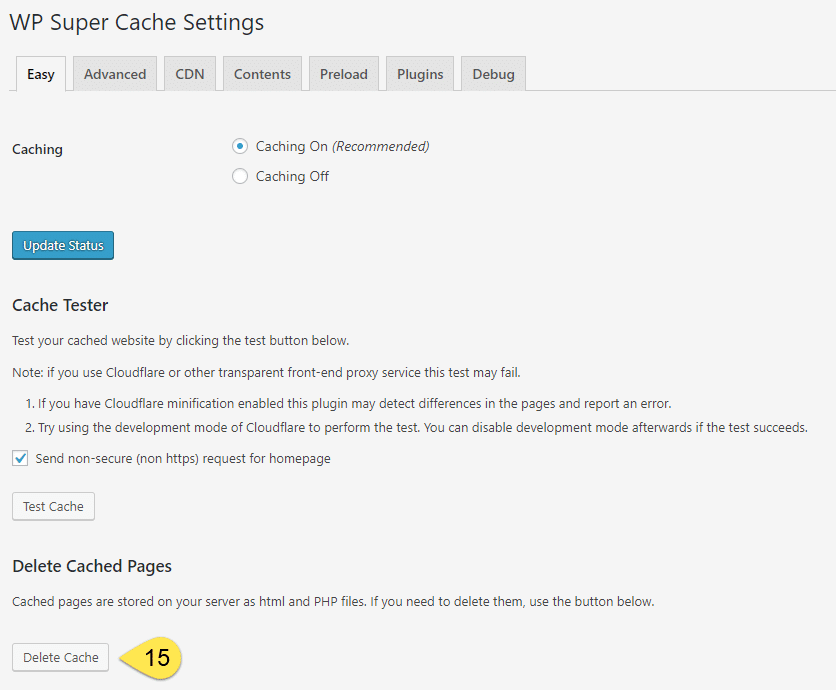
Step 10: When the Nameservers have been transferred, the status in the CloudFlare Dashboard changes to Active. Once you see Active, it’s time to head back to our WordPress Dashboard. Go to Add Plugins and type into the search box “WP Super Cache”. Once found, then click Install Now.
Questions?
If you have any questions about this tutorial on How to Setup WP Super Cache with CloudFlare, please feel free to ask in the comments below and I will try my best to answer them 🙂







 Hi, I'm Clint!


Hi,
Is the article complete ??. Correct me , if I am wrong
In WP SUper Cache , there is a tab called CDN . Do we not add anything over there ??
Thanks Akshay for the question about the CDN tab within WP Super Cache.
This is used when you setup traditional CDN’s such as MaxCDN or KeyCDN, but does not need to be checked for Cloudflare.
Hope this helps 🙂
Thanks, I was wondering that too. I thought that using CDN settings I can somehow add more value to that setting.
Good to hear this was helpful Mike 🙂
My website creating a problem with posting new content. I am using Cloudflare+W3 total cache
Hi Shashikant, I’m sorry to hear you’re having issues with posting new content. Without knowing the exact error message, it’s a bit hard to tell what is going on. The first advice would be to make sure you have the latest version of WordPress & each plugin installed. A couple of other things to try include deleting and re-installing W3 Total Cache, you can also try turning off Minify. I hope you can get your site up and working again soon 🙂
After setting wp super cache and cloudflare, my site score getting low than previous in gtmetrix and google page speed insight. Ssl certificate is active but not showing. These two issue occurs.
Hi Subodh, that can be frustrating when your site score is not as high as it should be. The most important stat is the actual load time of your site – I would focus on how this is changing as you try different setups.
Nice article, thank for share it.
I’m glad you enjoyed it Aman 🙂
Nice article
Really helped clear my doubts
Just have a few small question which everyone might have
1. Can using a caching plugin like Wp super cache actually help? Cause according to me caching is already being done by cloudflare
2. When trying to clear cache
Should I delete cache from only Wp super cache or only cloudflare or from both
3. Should I also use a image compression Plugin to speed up the load time
Or like question 1 even this is not needed as cloudflare offers this service as well
I’m really happy to hear that this article was able to help you Bhargav.
To answer your questions above:
1. You are correct, Cloudflare does perform caching functions. From my testing, I have found that combining a Caching plugin with Cloudflare results in a 30% to 40% faster site >>> https://wpdingo.com/fastest-wp-cloudflare-caching-combo
2. I would recommend clearing from both after you’ve made changes to your WordPress site.
3. Cloudflare does offer image optimization services called Mirage & Polish, but they are only available in their paid plans. I have found WordPress image optimization plugins beneficial – I ran tests over 3 months last year to find out which one is best >>> https://wpdingo.com/fastest-wordpress-image-optimizers
I hope this helps you speed up your site Bhargav 🙂
When using WP Super Cache and Cloudflare (default) settings. I’m assuming CF is caching WP Super Cache html files? If so, there should be no more hits to the original server apache for cache lookups redirects (think that’s how WP Super Cache works)?
I am using wp super cache and also using cloudflare. Can u please Help me out with how to setup cdn with clodflare and wp super cache. if Possible then please help me out.