As part of the 2016 Speed Study, the 2017 Speed Study and the 2018 Speed Study, W3 Total Cache was setup using the steps below…

W3 Total Cache Banner

How to Setup W3 Total Cache – Step by Step

Install W3 Total Cache

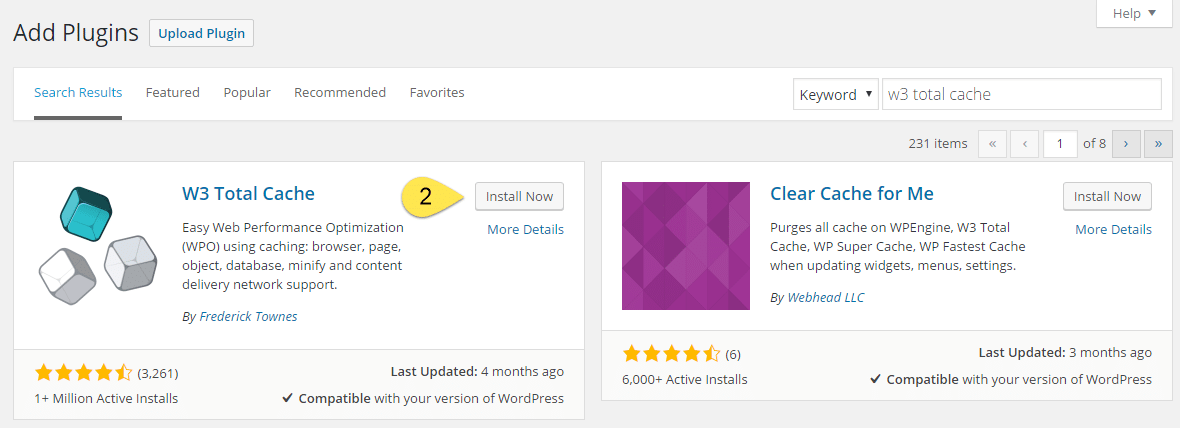
Step 1: Go to the Add New Plugins page of WordPress. Type “W3 Total Cache” into the Search box and click enter.

WordPress Caching Plugin Installation - Screenshot 1

Step 2: To start installing the W3 Total Cache plugin, click Install Now.

How to Install WordPress Caching Plugin - Screenshot 2

Step 3: Then click Activate Plugin

Activate WordPress Caching Plugin - Screenshot 3

W3 Total Cache Settings

Step 4: Now that the plugin is installed and activated, click Settings

W3 Total Cache Settings - Screenshot 4

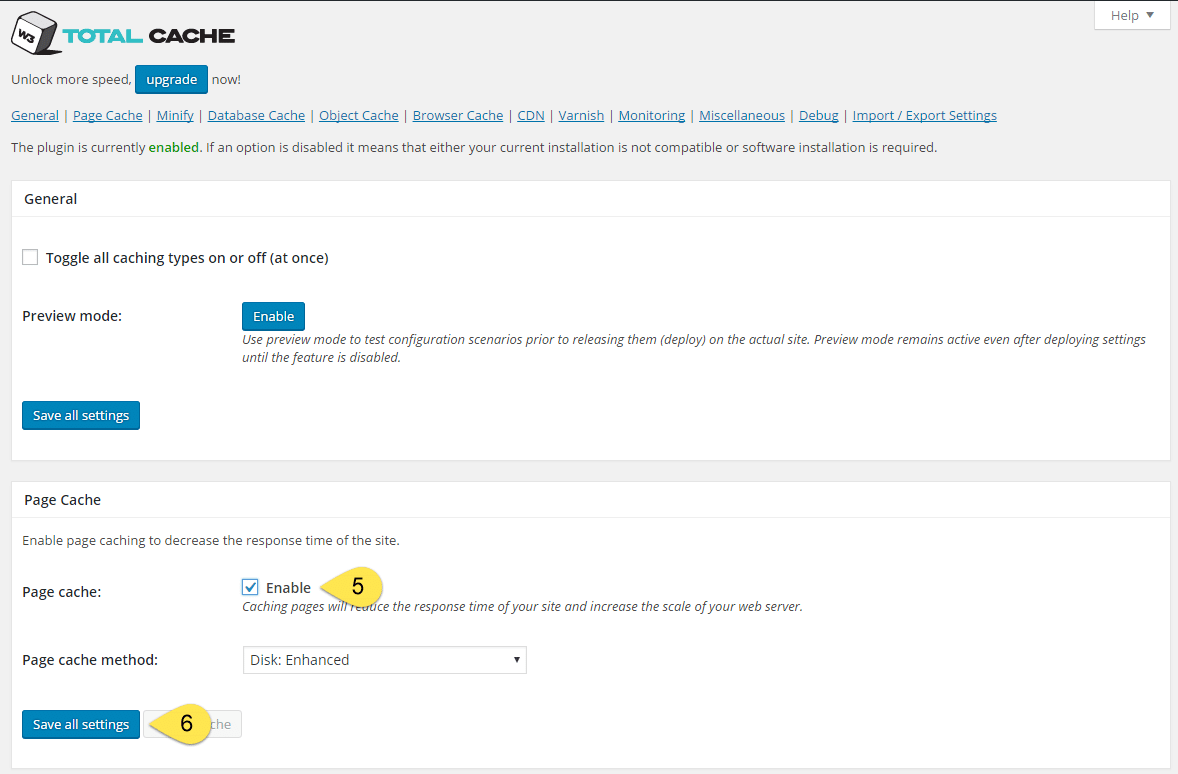
Step 5: On the General Settings page for W3 Total Cache, go to the Page Cache section. Check Enable for Page Cache.

Step 6: Click Save all Settings

W3 Total Cache - Page Cache - Screenshot 5

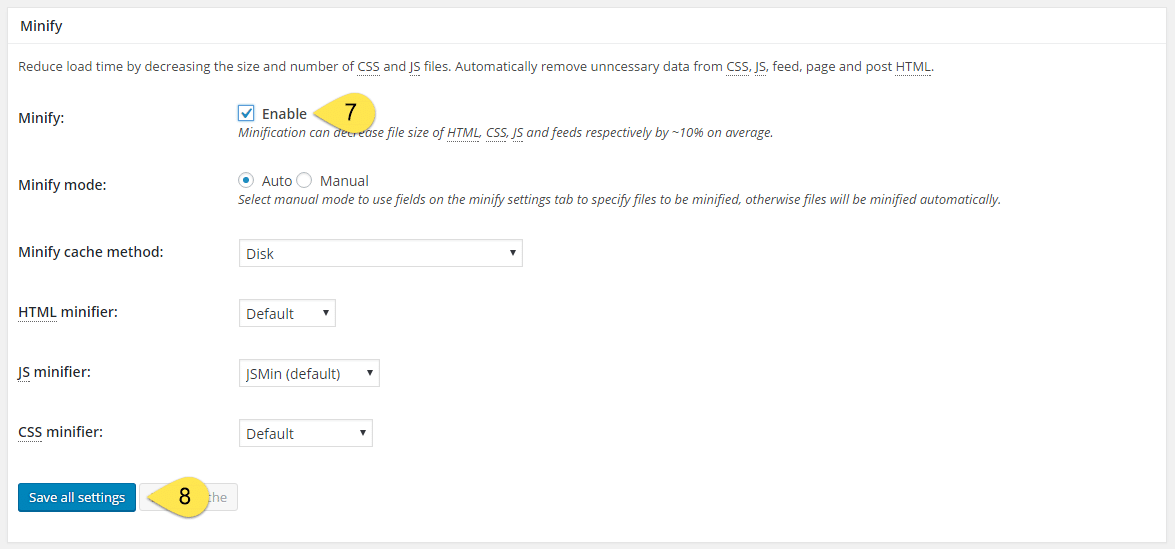
Step 7: Still on the General Settings page, go to the Minify section. Check Enable Minify.

Step 8: Then click Save All Settings

Minify Settings - Screenshot 6

Page Cache Settings

Step 9: Navigate to the Page Cache page within W3 Total Cache. Check Cache Feeds.

Steps 10 – 12: Also check Cache SSL Requests, Cache Requests only for your site. Then Save All Settings.

Page Cache Settings - Screenshot 7

Step 13: Still on the Page Cache page, go to the Cache Preload section. Check Automatically Prime the Page Cache.

Steps 14 & 15: Type in your sitemap URL. Click Save All Settings

Page Cache - Cache Preload - Screenshot 8

Step 16: Navigate down to Advanced (still within Page Cache). Check Enable Compatibility Mode and click Save All Settings

Page Cache Advanced - Screenshot 9

Minify Settings

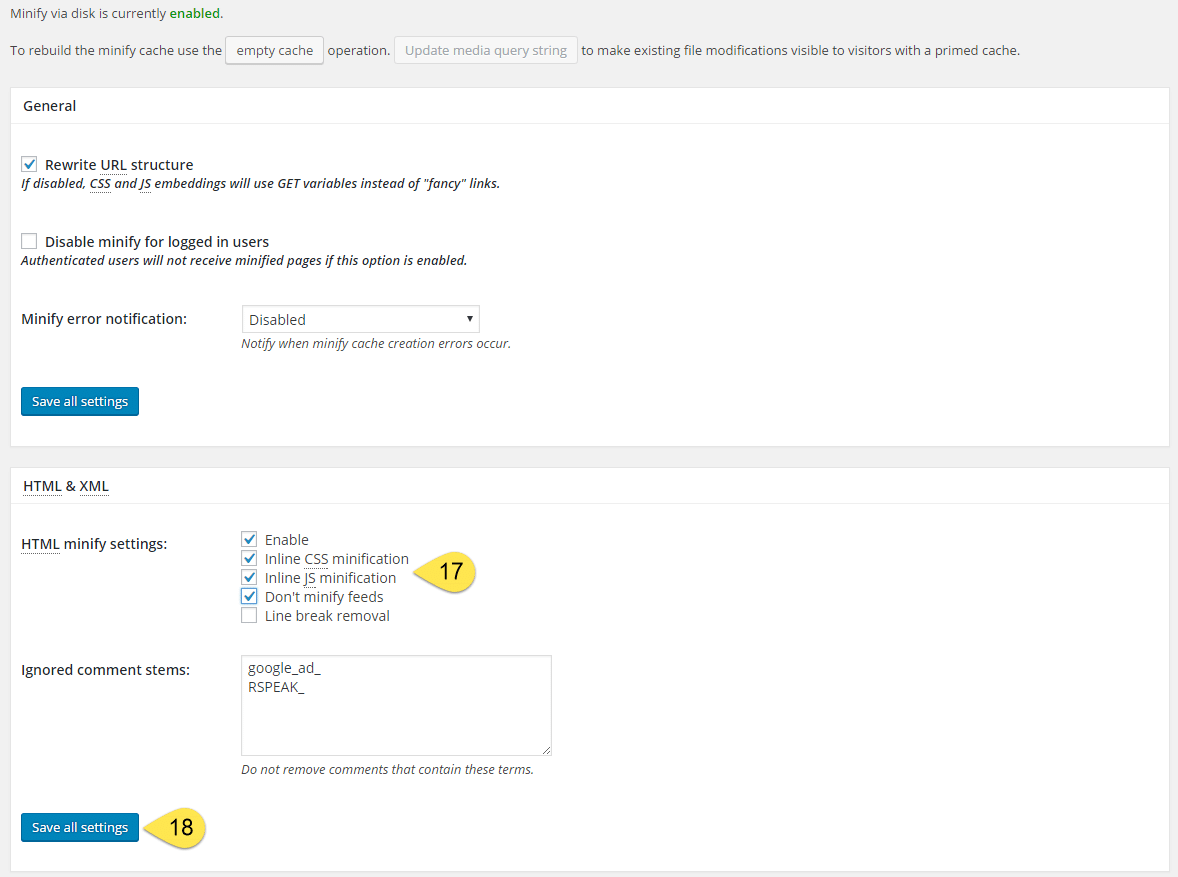
Step 17: Go to the Minify page within W3 Total Cache. Check the 1st 4 boxes in the HTML Minify Settings section.

Step 18: Click Save All Settings.

Minify Settings - Screenshot 10

Step 19: Still within the Minify page go to the JS section and select the radio button Combine Only. Leave Default (blocking) as is.

Step 20: Click Save All Settings.

Minify JS Settings - Screenshot 11

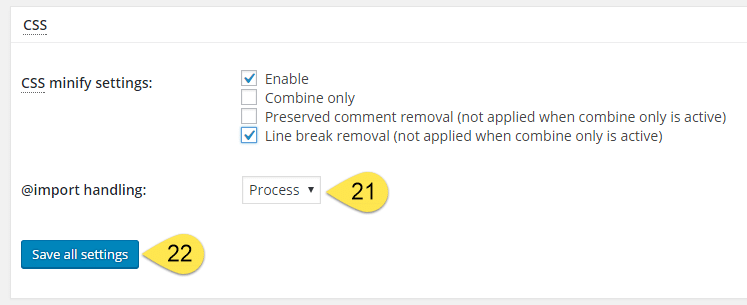
Step 21: Still within the Minify page, go to the CSS section. Check Line Break Removal and choose @import handling to be Process.

Step 22: Click Save All Settings.

Minify CSS Settings - Screenshot 12

Browser Cache Settings

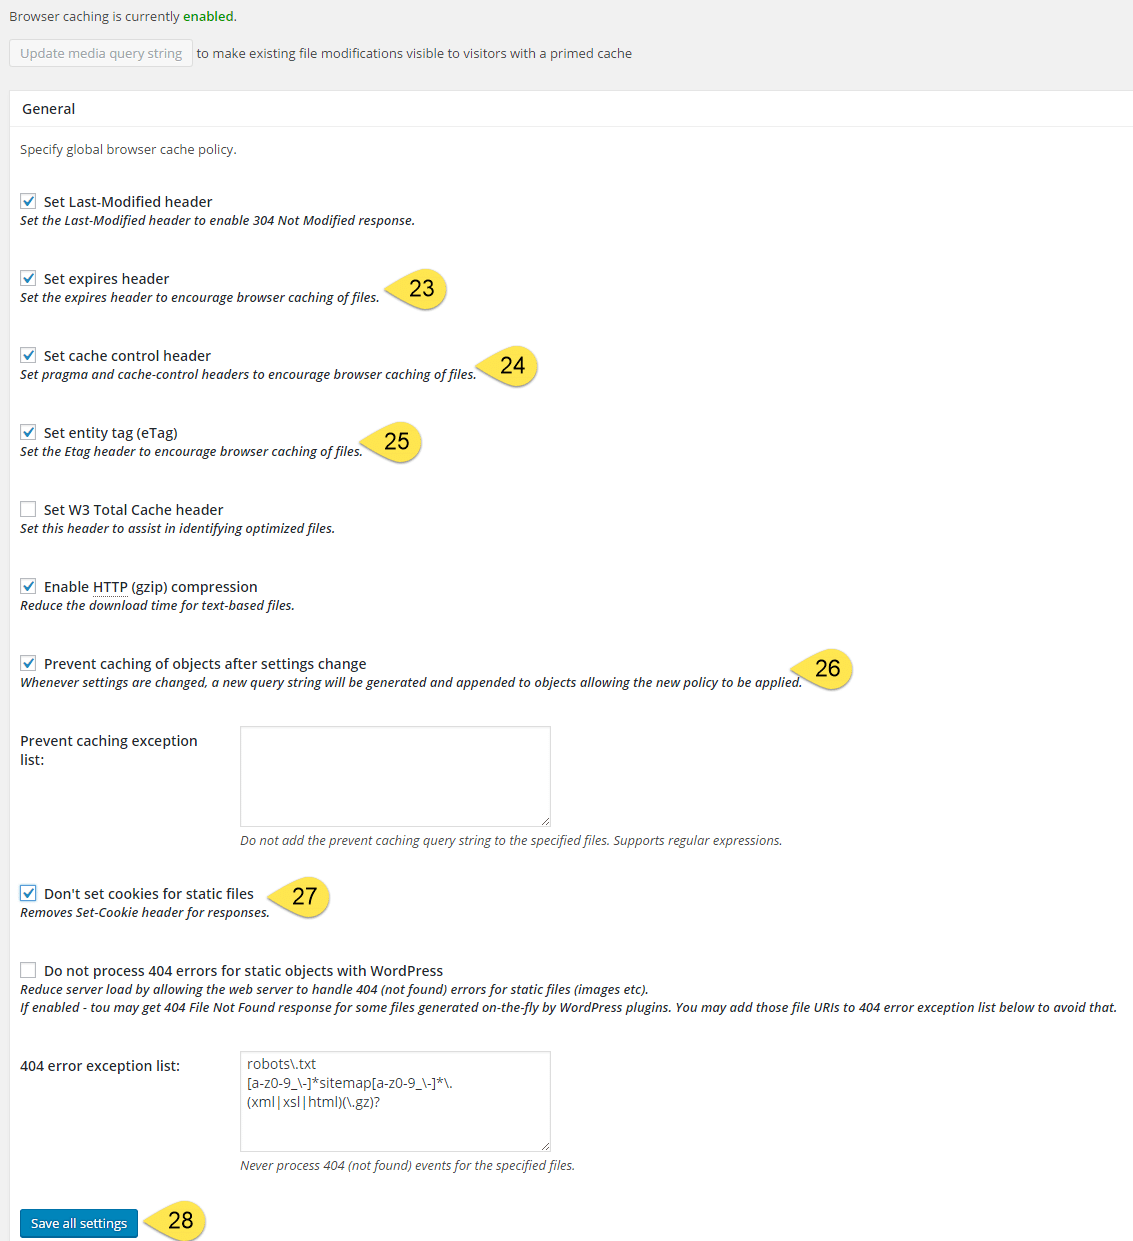
Steps 23 – 27: Go to the Browser Cache page within W3 Total Cache. Then check each of the boxes indicated in the image below.

Step 28: Click Save All Settings.

Browser Cache Settings - Screenshot 13

Step 29: We have now completed all the Settings. The final step is to go to the Dashboard page within W3 Total Cache and click Empty All Caches.

Empty All Caches - Screenshot 14

Questions?

If you have any questions about this tutorial on How to Setup W3 Total Cache, please feel free to ask in the comments below and I will try my best to answer them 🙂